Mazda 6 Service Manual: Rear window glass installation
Caution
- To prevent the sealant from cracking or the glass from being pushed out by air pressure if a door is closed, open all of the windows and leave them open until the sealant has hardened.
1. Cut away the old sealant using a razor so that 1-2 mm {0.04-0.07 in}
thickness of sealant remains around the circumference of the frame.
Warning
- Using a razor with bare hands can cause injury. Always wear gloves when using a razor.
2. If the sealant has come off completely in any one place, apply some primer after degreasing, and allow it approximately 30 minutes
to dry. Then put on new sealant to create a 2 mm {0.08 in}
layer.
3. Clean and degrease an approximately 50.0 mm {1.97 in}
wide strip around the circumference of the glass and the bonding area on the body.
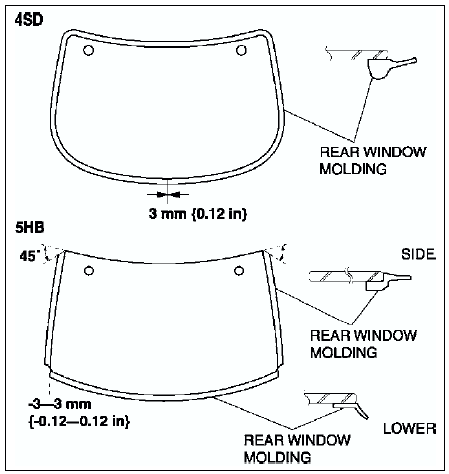
4. Install the molding as shown in the figure.
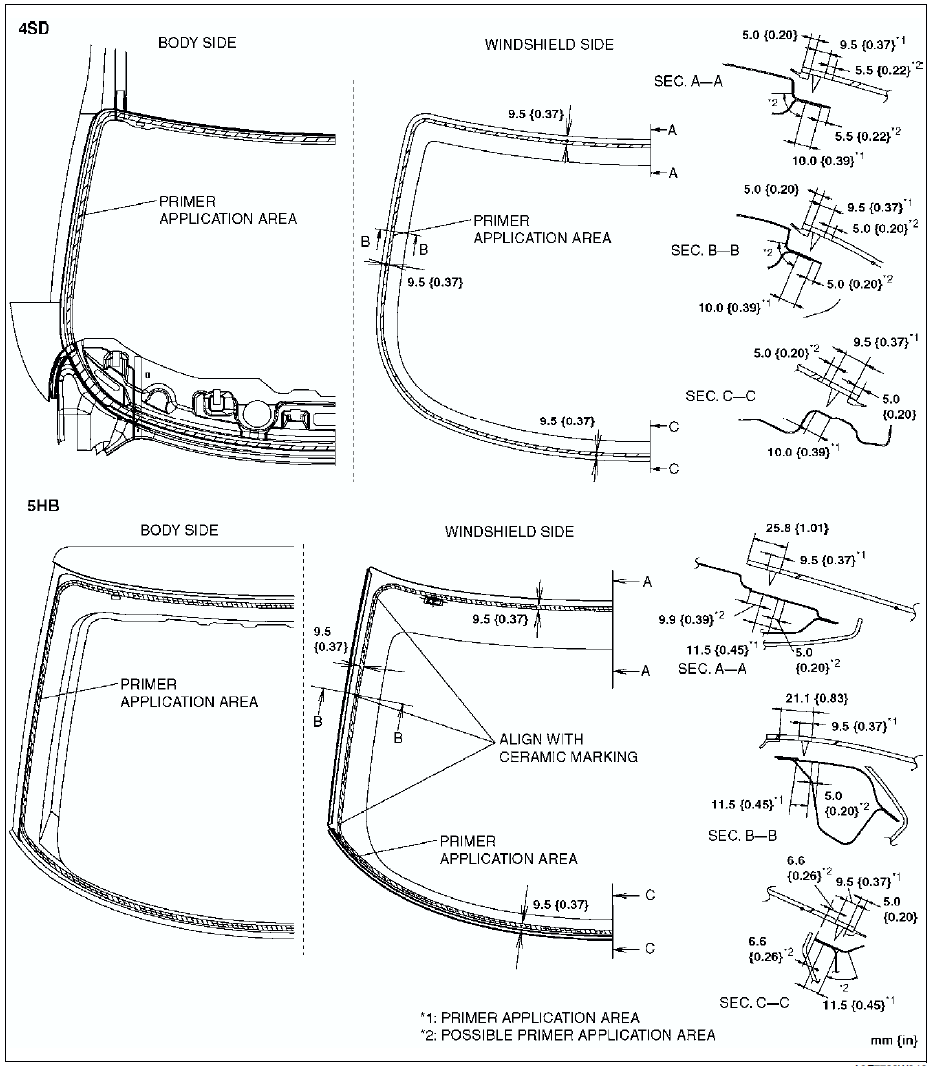
5. Use only glass primer on the glass, and body primer on the body and the molding. Allow it to dry for approximately 30 minutes.
Caution
- Keep the area free of dirt and grease, and do not touch the surface or the primer may not properly bond to the surface of the glass and body, which may cause leaks to occur.
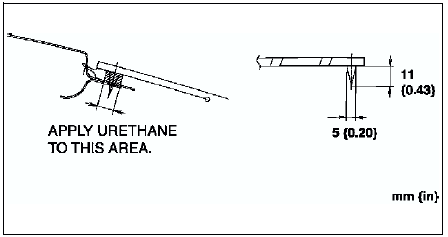
6. Apply urethane to the area of the glass surface as shown in the figure.
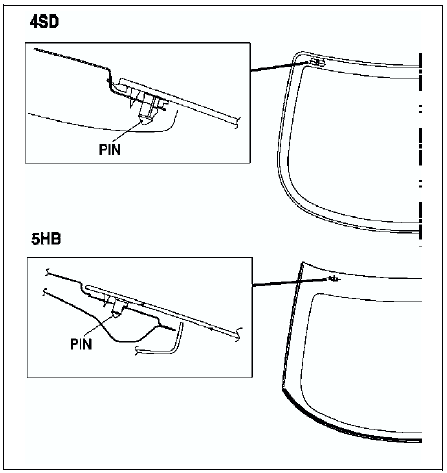
7. Set the position of the front windshield glass and insert a pin into the body. Install the glass.
8. Verify that the gap of the upper part is 7.3 mm {0.29 in}
and the A pillar part is 6.8 mm {0.27 in}.
(Only for 4SD)
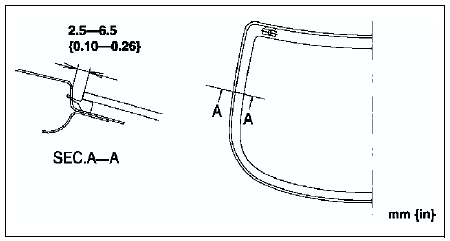
9. Keeping the measurement of the molding lip gap within specification, press completely along the perimeter of the glass.
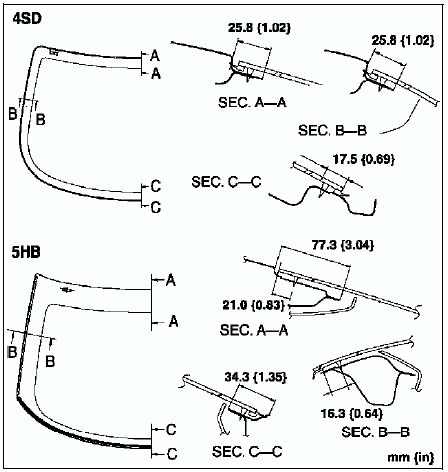
10. For the 4SD, install the following parts:
(1) Install the headliner.
(2) Install the rear package trim.
11. For the 5HB, install the following points.
(1) Install the rear wiper motor.
(2) Install the liftgate lower trim.
12. Allow the sealant to harden completely.
Sealant hardening time: 24 hours
 Rear window glass removal
1. For the 4SD, remove the following parts:
(1) Remove the headliner.
(2) Remove the rear package trim.
2. For the 5HB, remove the following parts.
(1) Remove the rear wiper arm and blade ...
 Sliding sunroof
...
Other materials:
Mazda 6 Service Manual: Stabilizer control link inspection
1. Remove the stabilizer control link from the vehicle.
2. Inspect for bending and damage.
3. Measure the ball joint starting torque.
(1) Rock the ball joint stud side to side 10 times.
(2) Rotate the ball joint stud 10 times.
(3) Measure the starting torque using a suitable allen so ...
Mazda 6 Service Manual: Emergency Locking Mode
When the seat belt is fastened, it will always be in the emergency locking mode. In the emergency locking mode, the belt remains comfortable on the occupant and the retractor will lock in position during a collision.
If the belt is locked and cannot be pulled out, retract the belt once, and then ...
