Mazda 6 Service Manual: Clutch unit removal/installation
1. Remove in the order indicated in the table.
2. Install in the reverse order oremoval.
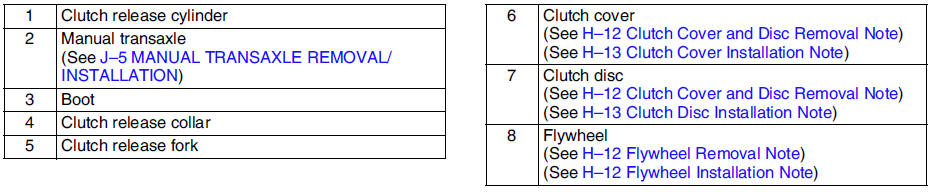
Clutch Cover and Disc Removal Note
1. Install the SSTs.
2. Loosen each bolt one turn at a time in a crisscross pattern until spring tension is released.
3. Remove the clutch cover and disc.
Flywheel Removal Note
1. Hold the flywheel using the SST.
2. Remove the bolts evenly and gradually in a crisscross pattern.
3. Remove the flywheel.
Flywheel Installation Note
1. Install the flywheel to the crankshaft.
2. When reusing the bolts, clean threads and hole, then apply locking compound to the threads.
Note
- No locking compound is needed when using new bolts.
3. Hand-tighten the flywheel lock bolts.
4. Install the SST
to the flywheel.
5. Gradually tighten the flywheel lock bolts in a crisscross pattern.
Tightning torque
108-115 N·m {11.1-11.7 kgf·m, 79.7-84.8 ft·lbf}
Clutch Disc Installation Note
Hold the clutch disc position using the SST
.
Clutch Cover Installation Note
1. Install the SSTs.
2. Tighten the bolts evenly and gradually in a crisscross pattern.
Tightening torque 18.6-25.5 N·m {1.9-2.6 kgf·m, 14-19 ft·lbf}
 Clutch unit
...
 Clutch cover inspection
1. Measure the wear of the diaphragm spring fingers.
If not as specified, replace the clutch cover.
Depth
0.6 mm {0.024 in} max.
2. Measure the flatness of the pressure plate with a s ...
Other materials:
Mazda 6 Service Manual: No. 1 one or more on-board diagnostic functions inoperative
When performing an asterisked (*) troubleshooting inspection, shake the
wiring harness and connectors while doing the inspection to discover whether
poor contact points are the cause of any intermittent malfunctions. If there
is a problem, check to make sure connectors, terminals and wir ...
Mazda 6 Service Manual: Starting procedure for on-board diagnostic test mode
Note
All DTCs displayed in the on-board diagnostic test mode should be
entered in the Audio Repair Order Form.
1. Turn the ignition switch to the ACC or ON position.
2. First press the POWER button, then simultaneously press the AM button and
TAPE/MD button for 2 seconds or more.
N ...