
Mazda 6 Service Manual: Fan motor
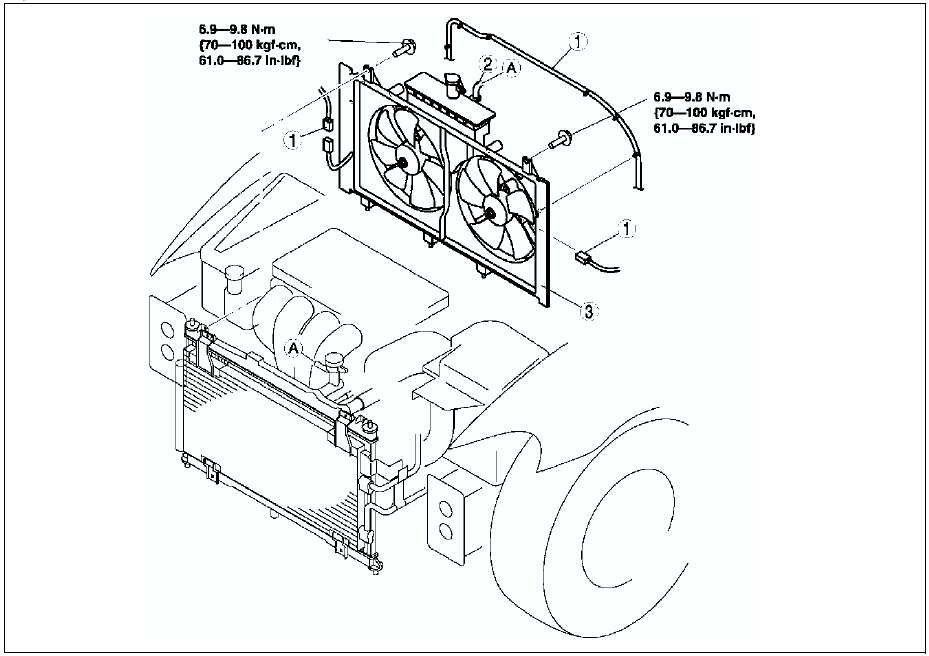
COOLING FAN REMOVAL/INSTALLATION
1. Disconnect the negative battery cable.
2. Remove the shroud panel. (See SHROUD PANEL REMOVAL/INSTALLATION.)
3. Remove the A/C pipe stay.
4. Remove the ATX pipe stay (ATX).
5. Remove in the order indicated in the table.
6. Install in the reverse order of removal.

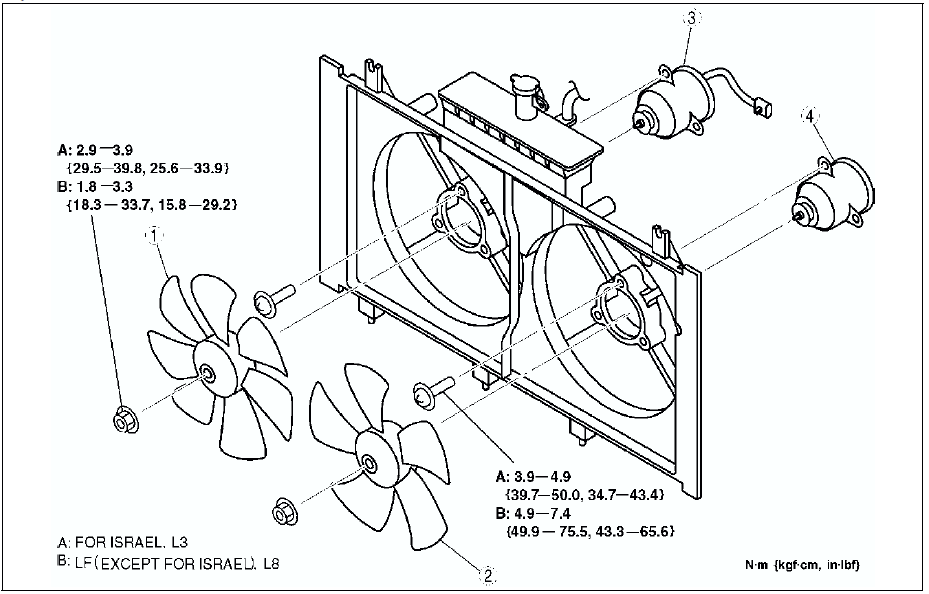
COOLING FAN MOTOR REMOVAL/INSTALLATION
1. Remove the cooling fan. (See COOLING FAN REMOVAL/INSTALLATION.)
2. Remove in the order indicated in the table.
3. Install in the reverse order of removal.

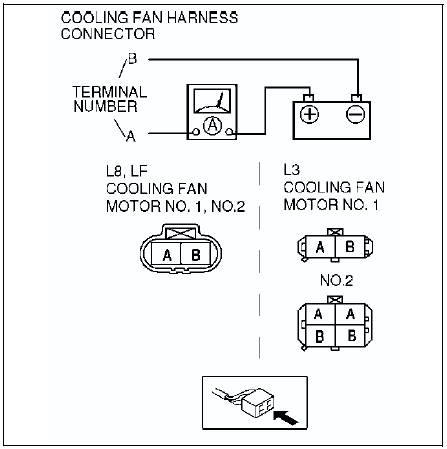
COOLING FAN MOTOR INSPECTION
1. Verify that the battery is fully charged.
2. Connect battery positive voltage and an ammeter to the fan motor connector.
3. Verify that the fan motor operates smoothly at the standard current draw.
- If not as spcifid, replace the fan motor.

 Water pump
1. Disconnect the negative battery cable.
2. Drain the engine coolant. (See COOLING SYSTEM SERVICE WARNINGS.) (See
ENGINE COOLANT REPLACEMENT.)
3. Loosen the water pump pulley bolt to remove the d ...

Other materials:
Mazda 6 Service Manual: Rear door garnish installation
Note
Double-sided adhesive tape has already been attached to the new
rear door garnish.
Warning
Using a razor with bare hands can cause injury. Always wear gloves
when using a razor.
1. When installing a new rear door garnish, follow the procedure below:
(1) Remove the adhesi ...
Mazda 6 Service Manual: Technical data
ENGINE
LUBRICATION SYSTEM
Note
The maintenance intervals on scheduled maintenance table (See
SCHEDULED MAINTENANCE TABLE) can only be supported by the use of following
oils.
Recommended engine oil
COOLING SYSTEM
FUEL AND EMISSION CONTROL SYSTEMS
ENGINE ELECTRICAL SYSTEM
...