
Mazda 6 Service Manual: Oil pan
OIL PAN REMOVAL/INSTALLATION
Warning
- Hot engine and engine oil can cause severe burns. Turn off the engine and wait until it and the engine oil have cooled.
1. Disconnect the negative battery cable.
2. Remove the under cover.
3. Drain the engine oil. (See ENGINE OIL REPLACEMENT.)
4. Remove the engine front cover. (See TIMING CHAIN REMOVAL/INSTALLATION.)
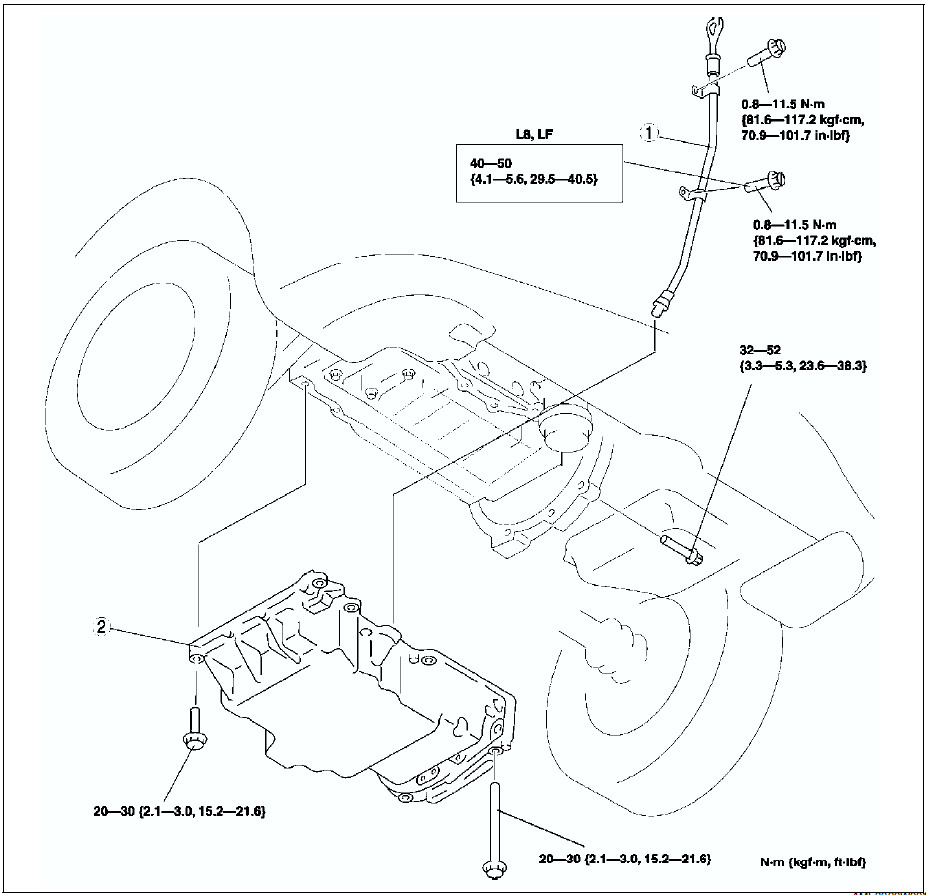
5. Remove in the order indicated in the table.
6. Install in the reverse order of removal.
7. Inspect the oil level. (See ENGINE OIL INSPECTION.)
8. Start the engine and inspect for oil leakage.
- If the oil leaks, specify the faulty part and repair or replace it.

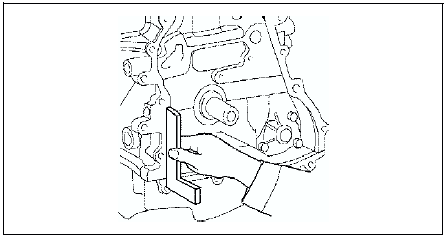
Oil Pan Installation Note
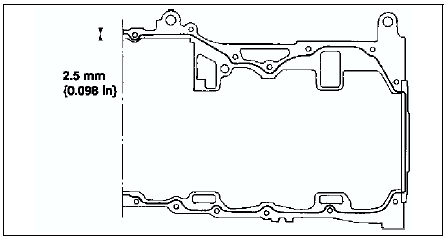
1. Use a square ruler to unite the oil pan and the cylinder block junction side on the engine front cover side.
2. Apply silicone sealant to the oil pressure switch threads as shown.
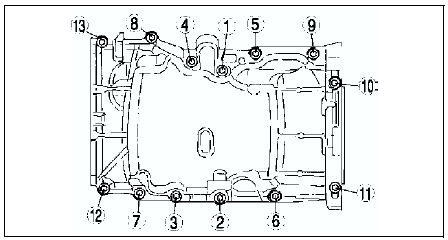
3. Tighten the bolts in the order shown.
 Oil cooler
LF, L3
1. Remove the under cover.
2. Drain the engine coolant. (See ENGINE COOLANT REPLACEMENT.)
3. Remove the oil filter cover, and drain the engine oil into a container.
(See OIL FILTER REPLACE ...
 Oil pump
OIL PUMP REMOVAL/INSTALLATION
1. Disconnect the negative battery cable.
2. Drain the engine oil. (See ENGINE OIL REPLACEMENT.)
3. Remove the oil pan. (See OIL PAN REMOVAL/INSTALLATION.)
4. Remove ...
Other materials:
Mazda 6 Service Manual: Master cylinder removal/installation
1. Remove in the order indicated in the table.
R.H.D.
L.H.D.
2. Install in the reverse order of removal.
Master Cylinder Installation Note
Caution
Always install the gasket of the power brake unit push rod before
performing measurement inspections or adjustments.
1. Install the ...
Mazda 6 Service Manual: Audio Operation Using Voice Recognition
Voice command
When the talk button is pressed and the following command is spoken, the audio
or navigation can be operated. The commands in the () can be omitted. The specified
name and number are put into the {}.
Standard command
Communication (phone) related command
Entertainment (audi ...