Mazda 6 Owners Manual: Replacing Interior Light Bulbs
Overhead lights/Front map lights (LED type), Rear map lights (LED type)
The LED bulb cannot be replaced as a single unit because it is an integrated unit. The LED bulb has to be replaced with the unit. We recommend an Authorized Mazda Dealer when the replacement is necessary.
Overhead lights/Front map lights (Bulb type), Rear map lights (Bulb type), Vanity mirror lights (Some models), Courtesy lights
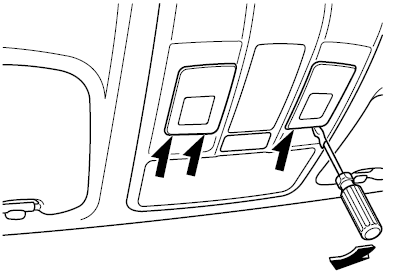
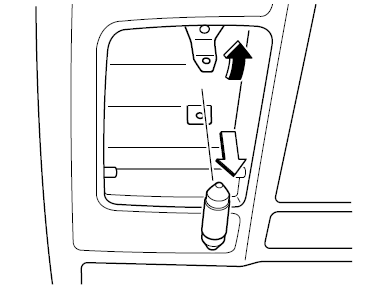
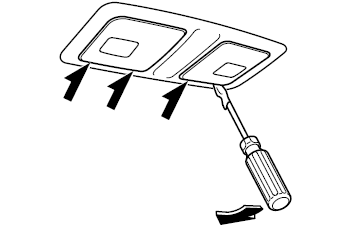
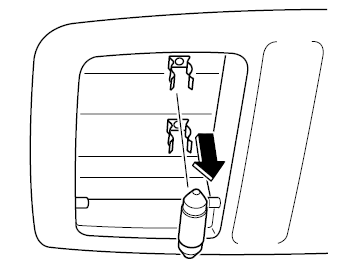
1. Wrap a small flathead screwdriver with a soft cloth to prevent damage to the lens, and then remove the lens by carefully prying on the edge of the lens with the flathead screwdriver.
2. Disconnect the bulb by pulling it out.
Overhead lights/Front map lights
Rear map lights
Vanity mirror lights (Some models)
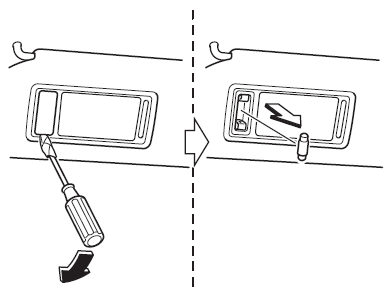
Courtesy lights
3. Install the new bulb in the reverse order of the removal procedure.
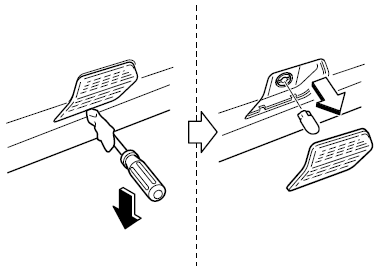
Trunk light
1. Press both sides of the lens cap to remove it.
2. Disconnect the bulb by pulling it out.
3. Install the new bulb in the reverse order of the removal procedure.
 Replacing Exterior Light Bulbs
Headlights (With LED headlights)
Low/High beam bulbs
The LED bulb cannot be replaced as a single unit because it is an integrated
unit.
The LED bulb has to be replaced with the unit. We recommend ...
 Fuses
Fuses
Your vehicle's electrical system is protected by fuses.
If any lights, accessories, or controls do not work, inspect the appropriate
circuit protector. If a fuse has blown, the inside element will ...
Other materials:
Mazda 6 Owners Manual: Tire Maintenance
Improper or inadequate vehicle maintenance can cause tires to wear abnormally.
Here are some important maintenance points:
Tire Inflation Pressure
Inspect all tire pressure monthly (including the spare) when the tires are cold.
Maintain recommended pressures for the best ride, top handling, an ...
Mazda 6 Owners Manual: Master cylinder removal/installation
1. Remove in the order indicated in the table.
R.H.D.
L.H.D.
2. Install in the reverse order of removal.
Master Cylinder Installation Note
Caution
Always install the gasket of the power brake unit push rod before
performing measurement inspections or adjustments.
1. Install the ...