Mazda 6 Service Manual: Service procedure
Inspection, adjustment
- Inspection and adjustment procedures are divided into steps. Important points regarding the location and contents of the procedures are explained in detail and shown in the illustrations.
Repair procedure
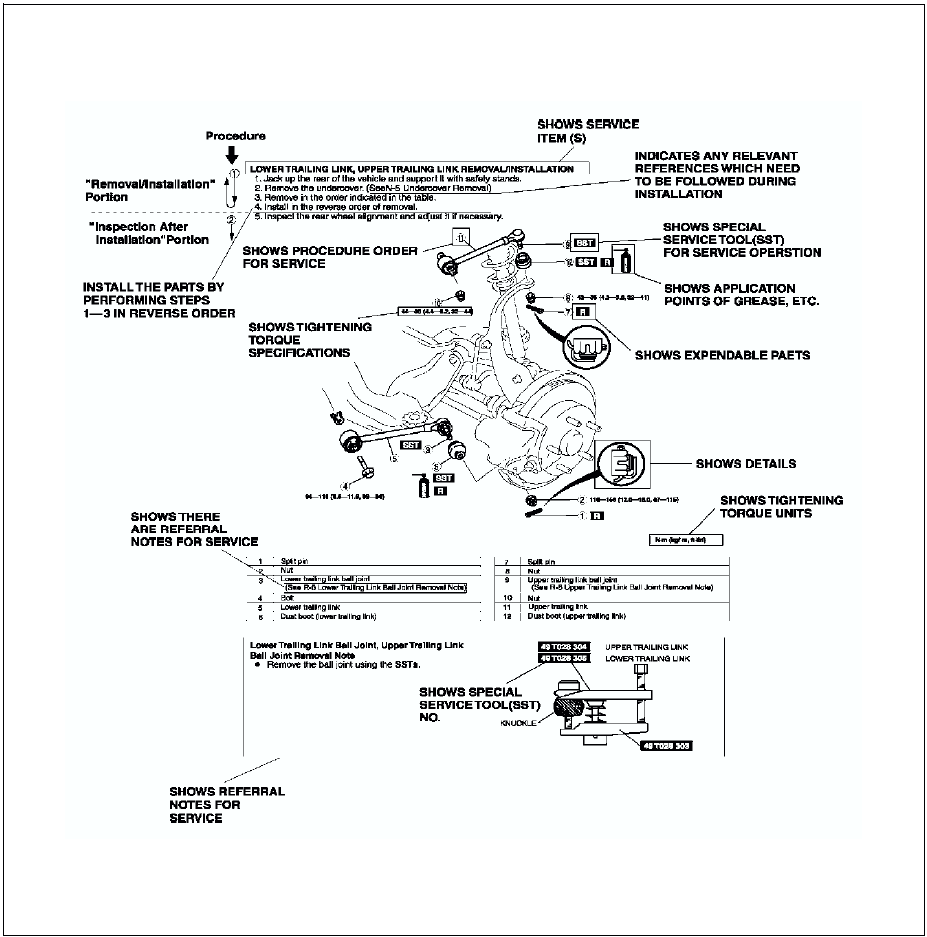
1. Most repair operations begin with an overview illustration. It identifies the components, shows how the parts fit together and describes visual part inspection. However, only removal/installation procedures that need to be performed methodically have written instructions.
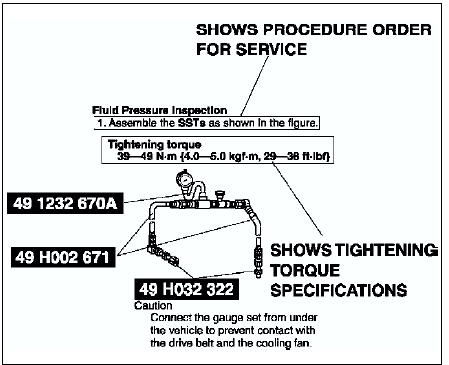
2. Expendable parts, tightening torques and symbols for oil, grease, and sealant are shown in the overview illustration. In addition, symbols indicating parts requiring the use of special service tools or equivalent are also shown.
3. Procedure steps are numbered and the part that is the main point of that procedure is shown in the illustration with the corresponding number. Occasionally, there are important points or additional information concerning a procedure. Refer to this information when servicing the related part.
 Range of topics
This manual contains procedures for performing all required service
operations. The procedures are divided into the following five basic
operations:
Removal/Installation
Disassem ...
 Symbols
There are eight symbols indicating oil, grease, fluids, sealant, and SST
or equivalent use. These symbols show application points or use of these
materials during service.
...
Other materials:
Mazda 6 Service Manual: Recommendations for Shifting
Upshifting
For normal acceleration, Mazda recommends these shift points:
For cruising, Mazda recommends these shift points:
Downshifting
When you must slow down in heavy traffic or on a steep upgrade,
downshift before the engine starts to overwork. This reduces the chance of stalling
and ...
Mazda 6 Service Manual: Coming Home Light
The coming home light turns on the headlights (low beams) when the lever is operated.
To turn on the lights
When the lever is pulled with the ignition switched to ACC or OFF, the low beam
headlights turn on.
The headlights turn off after a certain period of time has elapsed after the
doors ar ...