Mazda 6 Service Manual: Front stabilizer removal/installation
1. Remove the front crossmember component. (See FRONT CROSSMEMBER REMOVAL/INSTALLATION.)
2. Remove in the order indicated in the table.
3. Install in the reverse order of removal.
4. Adjust the headlight zeroset. (See HEADLIGHT ZEROSET.)
5. Inspect the front wheel alignment. (See FRONT WHEEL ALIGNMENT.)
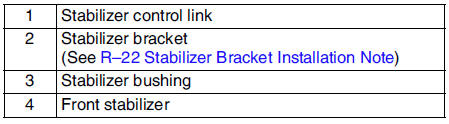
Stabilizer Bracket Installation Note
1. Apply rubber grease to the inside surface of the stabilizer bushing.
2. Align the bushing with the inside of positioning plate on the stabilizer bar.
3. Install the stabilizer bracket.
 Front lower arm (rear) inspection
1. Remove the lower arm (rear) from the vehicle.
2. Inspect for damage, cracks, and bending.
3. Inspect the ball joint rotation torque.
(1) Rotate the ball joint five times.
(2) Measure the ...
 Stabilizer control link inspection
1. Remove the stabilizer control link from the vehicle.
2. Inspect for bending and damage.
3. Measure the ball joint starting torque.
(1) Rock the ball joint stud side to side 10 times.
(2) Ro ...
Other materials:
Mazda 6 Service Manual: Power Moonroof Reset Procedure
If the battery is disconnected, the moonroof will not operate. The moonroof will
not operate correctly until it is reset.
Carry out the following procedure to reset the moonroof and resume operation:
1. Switch the ignition ON.
2. Press the tilt switch, to partially tilt open the rear of the moo ...
Mazda 6 Service Manual: Pcm removal/installation
Note
For replace the PCM, Setup the WDS and perform the PCM
configuration. (See PCM CONFIGURATION.)
1. Disconnect the negative battery cable.
2. For R.H.D, perform the following procedures.
(1) Remove the front side trim (left-side).
(2) Partially peel back the flower covering.
3 ...