Mazda 6 Service Manual: Master cylinder disassembly/assembly
Caution
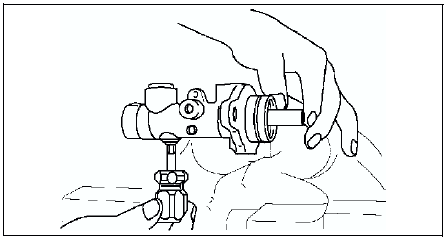
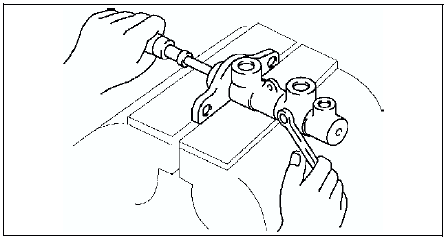
- If the master cylinder body is damaged, replace the unit as a component. When securing the master cylinder in a vise, tighten only the flange of the master cylinder.
1. Disassemble in the order indicated in the table.
2. Assemble in the reverse order of disassembly.
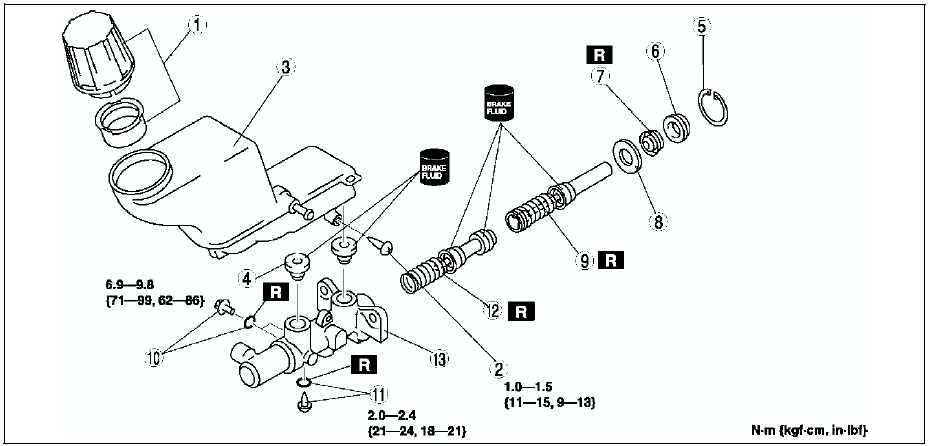


Stop Screw and O-ring (without ABS) Assembly Note
1. Install the secondary piston and primary piston.
2. Install the new O-ring onto the stop screw.
3. Push the primary piston assembly in full.
4. Install and tighten the stop screw.
Tightening torque 2.0-2.4 N·m {21-24 kgf·cm, 18-21 in·lbf}
5. Push and release the secondary piston component to verify that it is held properly by the stop screw.
Stop Pin and O-ring (with ABS) Assembly Note
1. Install the secondary piston with the piston hole facing the stop pin and primary piston.
2. Install the new O-ring onto the stop pin.
3. Push the primary piston assembly in full.
4. Install and tighten the stop pin.
Tightening torque 6.9-9.8 N·m {71-99 kgf·cm, 62-86 in·lbf}
5. Push and release the secondary piston component to verify that it is held properly by the stop pin.
 Fluid level sensor inspection
1. Disconnect the negative battery cable.
2. Disconnect the sensor connector.
3. Inspect for continuity between terminals of fluid level sensor.
If not as specified, replace the fluid level sens ...
 Power brake unit removal/installation
1. Remove the master cylinder. (See MASTER CYLINDER REMOVAL/INSTALLATION.)
2. Remove the wiper arm. (See WINDSHIELD WIPER ARM AND BLADE
REMOVAL/INSTALLATION.)
3. Remove the cowl grille. (See COWL ...
Other materials:
Mazda 6 Service Manual: Traction Control System (TCS)
The Traction Control System (TCS) enhances traction and safety by controlling
engine torque and braking. When the TCS detects driving wheel slippage, it lowers
engine torque and operates the brakes to prevent loss of traction.
This means that on a slick surface, the engine adjusts automatically ...
Mazda 6 Service Manual: Driving In Flooded Area
WARNING
Dry off brakes that have become wet by driving slowly, releasing the accelerator
pedal and lightly applying the brakes several times until the brake performance
returns to normal: Driving with wet brakes is dangerous. Increased stopping
distance or the vehicle pulling to one side when ...