Mazda 6 Service Manual: Rear upper arm removal/installation
Caution
- Performing the following procedures without first removing the ABS wheel-speed sensor may possibly cause an open circuit in the harness if it is pulled by mistake. Before performing the following procedures, remove the ABS wheel-speed sensor (axle side) and fix it to an appropriate place where the sensor will not be pulled by mistake while servicing the vehicle.
1. Remove in the order indicated in the table.
2. Install in the reverse order of removal.
3. Inspect the rear wheel alignment. (See REAR WHEEL ALIGNMENT.)
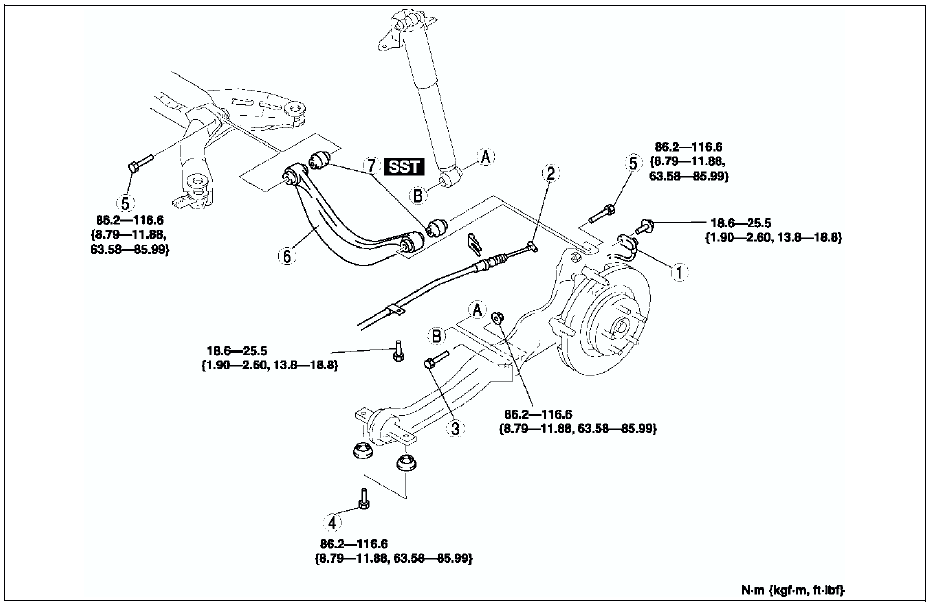

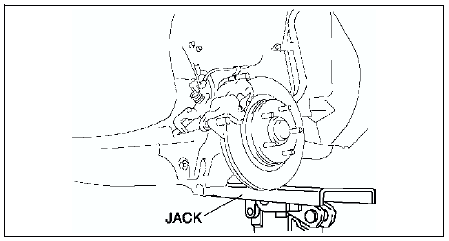
Bolt (Rear Shock Absorber Lower Side) Removal Note
Support the trailing link with a jack.
Bolt (Rear Upper Arm) Removal Note
Loosen the bolts on the inner and outer side of the lateral link.
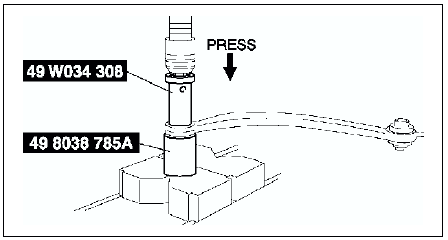
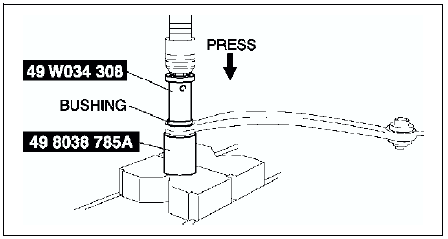
Rear Upper Arm Bushing Removal Note
Press the upper arm bushing out using the SSTs
.
Rear Upper Arm Bushing Installation Note
1. Mark the new bushing as shown in the figure.
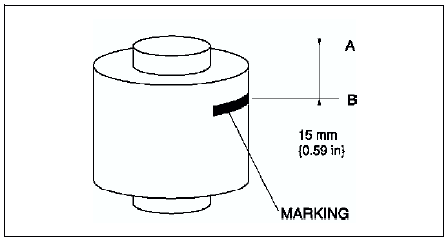
2. Press the bushing in to the marking using the SSTs
.
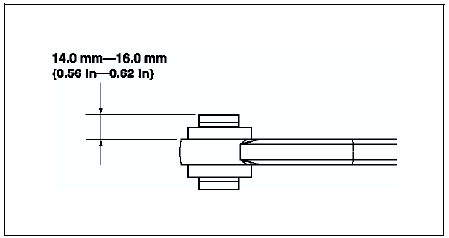
3. Verify that clearance distance A-B is 14.0 mm - 16.0 mm {0.56 in-0.62 in}.
 Rear lower arm removal/installation
1. Remove in the order indicated in the table.
2. Install in the reverse order of removal.
3. Inspect the rear wheel alignment. (See REAR WHEEL ALIGNMENT.)
...
 Rear lateral link removal/installation
Caution
Performing the following procedures without first removing the ABS
wheel-speed sensor may possibly cause an open circuit in the harness if it
is pulled by mistake. Before performing ...
Other materials:
Mazda 6 Service Manual: Fuse Panel Description
Fuse block (Engine compartment)
*Some models.
Fuse block (Left side)
*Some models. ...
Mazda 6 Service Manual: Knock sensor inspection
Note
Perform the following test only when directed.
Resistance Inspection
1. Turn the ignition switch to LOCK.
2. Disconnect the knock sensor connector.
3. Measure the resistance between the knock sensor terminals A and B using an
ohmmeter.
If not as specified, replace the knock sens ...
