Mazda 6 Service Manual: Service procedure
Inspection, adjustment
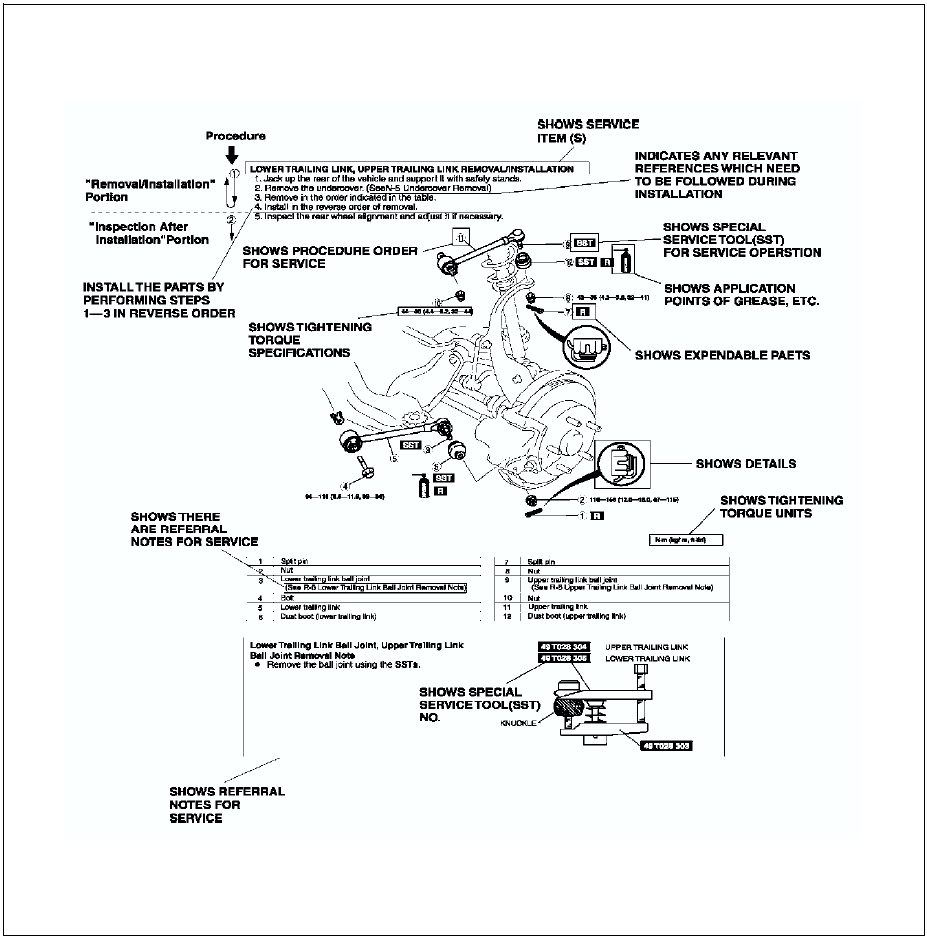
- Inspection and adjustment procedures are divided into steps. Important points regarding the location and contents of the procedures are explained in detail and shown in the illustrations.
Repair procedure
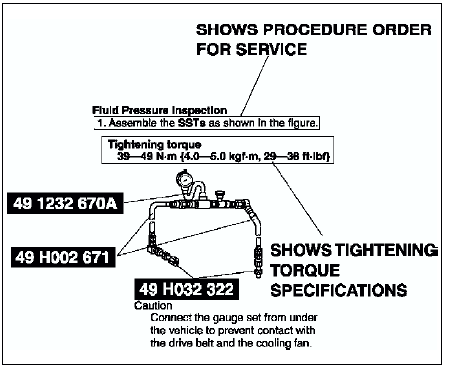
1. Most repair operations begin with an overview illustration. It identifies the components, shows how the parts fit together and describes visual part inspection. However, only removal/installation procedures that need to be performed methodically have written instructions.
2. Expendable parts, tightening torques and symbols for oil, grease, and sealant are shown in the overview illustration. In addition, symbols indicating parts requiring the use of special service tools or equivalent are also shown.
3. Procedure steps are numbered and the part that is the main point of that procedure is shown in the illustration with the corresponding number. Occasionally, there are important points or additional information concerning a procedure. Refer to this information when servicing the related part.
 Range of topics
This manual contains procedures for performing all required service
operations. The procedures are divided into the following five basic
operations:
Removal/Installation
Disassem ...
 Symbols
There are eight symbols indicating oil, grease, fluids, sealant, and SST
or equivalent use. These symbols show application points or use of these
materials during service.
...
Other materials:
Mazda 6 Service Manual: Electrical troubleshooting tools
Jumper wire
A jumper wire is used to create a temporary circuit. Connect the jumper
wire between the terminals of a circuit to bypass a switch.
Caution
Do not connect a jumper wire from the power source line to a body
ground. This may cause burning or other damage to wiring harnesse ...
Mazda 6 Service Manual: Drive shaft (mtx) disassembly/assembly
1. Disassemble in the order indicated in the table.
2. Assemble in the reverse order of disassembly.
Clip Disassembly Note
1. Mark the drive shaft and outer ring for proper assembly.
Caution
Mark with paint; do not use a punch.
2. Remove the clip.
Balls, Inner Ring, Cage Disassembl ...