Mazda 6 Service Manual: Pcm removal/installation
Note
- For replace the PCM, Setup the WDS and perform the PCM configuration. (See PCM CONFIGURATION.)
1. Disconnect the negative battery cable.
2. For R.H.D, perform the following procedures.
(1) Remove the front side trim (left-side).
(2) Partially peel back the flower covering.
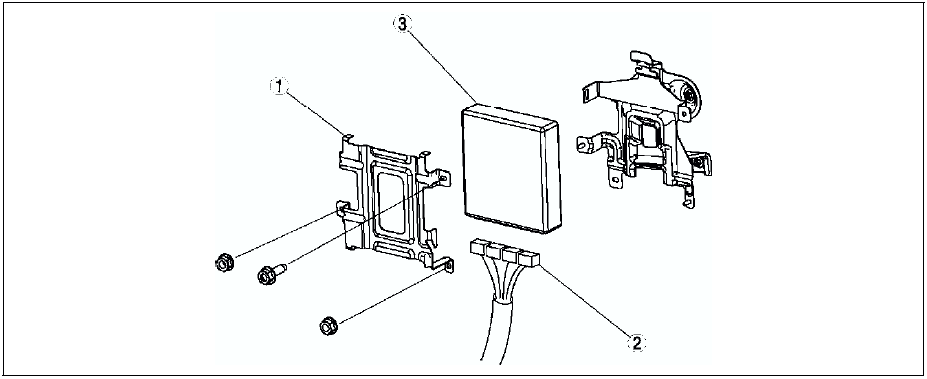
3. Remove in the order indicated in the table.
4. Install in the reverse order of removal.
U.K. specs.
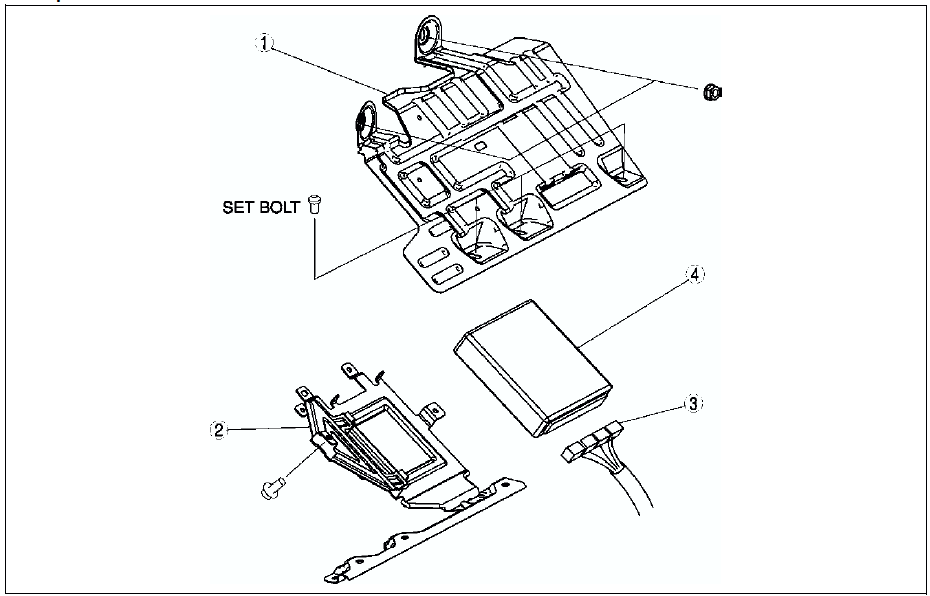

European (L.H.D.) specs.

Set Nut/bolt Removal Note
1. Using a chisel and a hammer, cut a groove on the head of the set nut/bolt so that a screwdriver can be inserted.
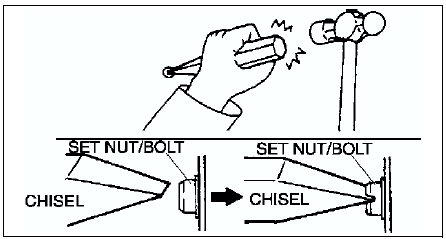
2. Loose the set nut/bolt using an impact screwdriver or pliers.
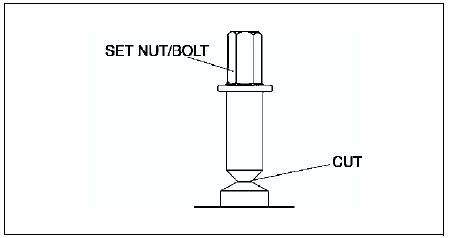
Set Nut/bolt Installation Note
Install a new set nut/bolt and tighten it until the neck of the nut/bolt is cut.
 Control system
...
 Pcm inspection
Note
PIDs for the following parts are not available on this model. Go
to the appropriate part inspection page.
- CMP sensor (See CAMSHAFT POSITION (CMP) SENSOR INSPECTION.)
- Main relay ...
Other materials:
Mazda 6 Service Manual: Variable air duct (vad) control solenoid valve inspection (l3)
1. Remove the VAD control solenoid valve. (See INTAKE-AIR SYSTEM
REMOVAL/INSTALLATION.)
2. Inspect airflow between the ports under the following conditions.
If not as specified, replace the VAD control solenoid valve.
If as specified, carry out the Circuit Open/Short Inspection.
Circ ...
Mazda 6 Service Manual: Special tools
ENGINE
Ford SST numbers are collated with Mazda SST numbers in the example below.
Ford SSTs are marked with Ford SST number.
Example
1: Mazda SST number
2: Ford SST number
LUBRICATION SYSTEM
COOLING SYSTEM
FUEL AND EMISSION CONTROL SYSTEMS
CLUTCH
MANUAL TRANSAXLE
AUTOMATIC T ...