Mazda 6 Service Manual: Foreword
Outline
- The OBD (on-board diagnostic) test inspects the integrity and function of the air bag system and outputs the results when requested by the specific tests.
- OBD test also:
- Provides a quick inspection of the air bag system.
- Is usually performed at the start of each diagnostic procedure.
- Provides verification after repairs to ensure that no other faults occurred during service.
- The OBD test is divided into three tests:
- Read/clear diagnostic results
- PID/data monitor and record
- Active command mode
- Diagnostic DTC can be read/cleared, using the SST
(WDS or equivalent).
Note
- When the air bag system is malfunctioning, turn the ignition switch to the ON position to display the current DTC, using the air bag system warning light on the instrument cluster. However this light is strictly for reference. Make sure to inspect the system, using the SST (WDS or equivalent).
Read/clear diagnostic results
- This function allows you to read or clear DTCs in the SAS unit memory.
PID/data monitor and record
- This function allows you access certain data values, input signals, calculated values, and system status information.
Active command modes
- This function allows you to control devices through WDS or equivalent.
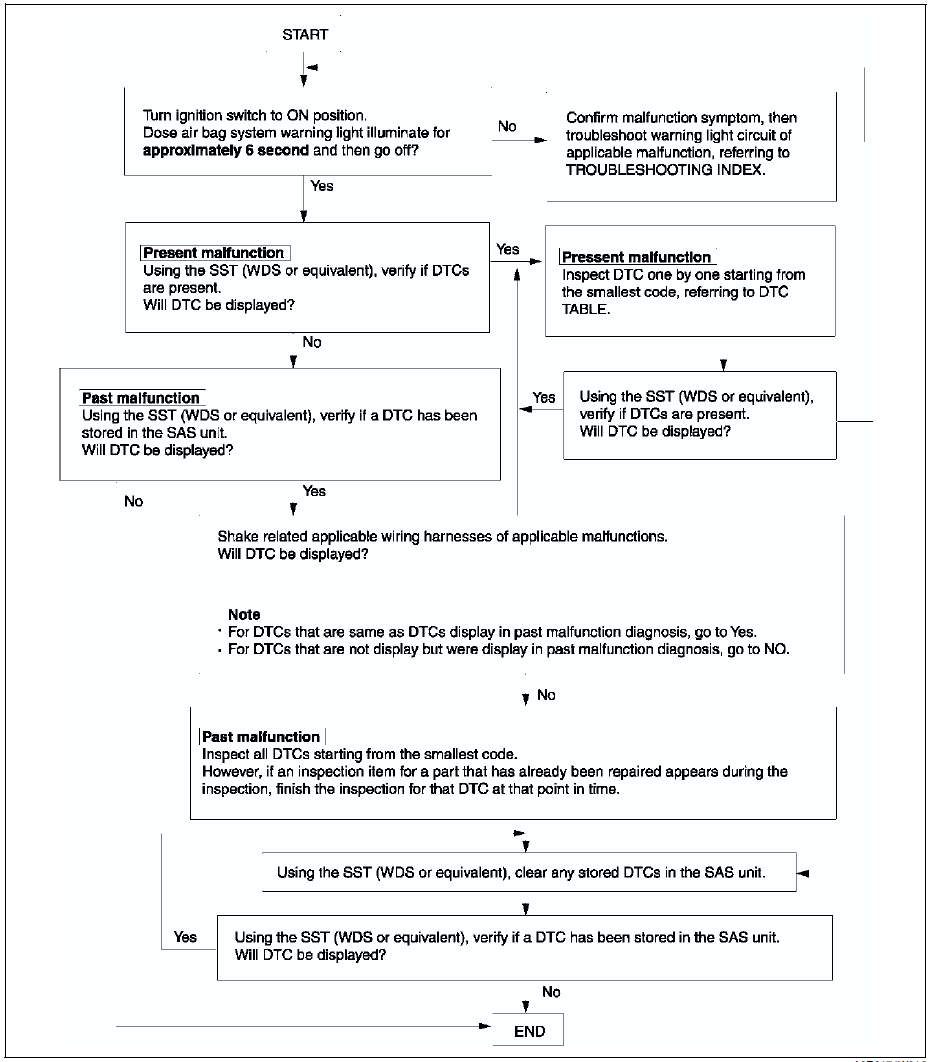
Flowchart
- Use the following flowchart to verify the cause of the trouble.
Note
- While performing the inspection of the past malfunction code, the applicable DTCs may be added to memory by removing or disconnecting the related parts. Inspect only the DTCs that were indicated before inspecting.
- When DTCs of present malfunction are no longer output after present and/or past malfunctions have been repaired, be sure to perform past malfunction display cancellation to prevent repair of malfunctions that have already been repaired.
DTCs Reading Procedure
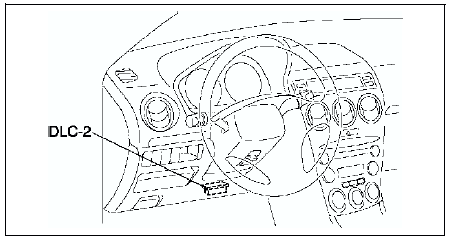
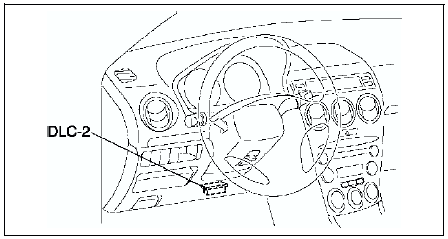
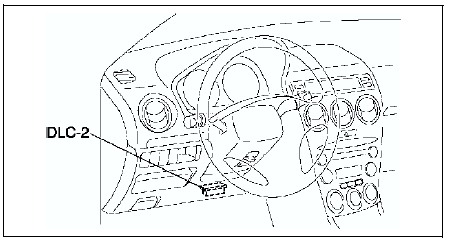
1. Connect SST
(WDS or equivalent) to the vehicle DLC-2 16-pin connector.
2. Retrieve DTC using SST (WDS or equivalent).
Clearing DTCs Procedure
1. After repairs have been made, perform the DTCs reading procedure.
2. Erase DTCs using SST
(WDS or equivalent).
3. Ensure that the customer's concern has been resolved.
PID/Data Monitor and Record Procedure
1. Connect SST
(WDS or equivalent) to the vehicle DLC-2 16-pin connector.
2. Access and monitor PIDs using SST
(WDS or equivalent).
Active Command Mode Procedure
1. Connect SST
(WDS or equivalent) to the vehicle DLC-2 16-pin connector.
2. Turn the ignition switch to ON position.
3. Activate active command mode using SST
(WDS or equivalent).

 Dtc table
DTCs are common for present and past malfunction diagnosis.
Note
When DTCs not shown in the DTC table are displayed, replace
the SAS unit.
If the air bag system warning light doe ...
Other materials:
Mazda 6 Service Manual: Oil cooler disassembly/assembly
1. Disassemble in the order indicated in the table.
2. Assemble in the reverse order of disassembly.
Radiator Outer Tank (In Tank Oil Cooler) Removal Note
1. Inspect the height of the header tabs.
2. Insert the end of a medium tip screwdriver between the end of the header
tab and the out ...
Mazda 6 Service Manual: Rear View Monitor Operation
The operation of the rear view monitor when reversing the vehicle varies depending
on the traffic, road, and vehicle conditions. The amount of steering and the timing
also varies depending on conditions, so confirm the surrounding conditions directly
with your eyes and steer the vehicle in acc ...