Mazda 6 Owners Manual: Replacing Windshield Wiper Blades
When the wipers no longer clean well, the blades are probably worn or cracked. Replace them.
CAUTION
To prevent damage to the wiper arms and other components, do not try to sweep the wiper arm by hand.
NOTE
When raising both windshield wiper arms, raise the driver's side wiper arm first. When lowering the wiper arms, slowly lower the wiper arm from the passenger's side first while supporting it with your hand. Forcefully lowering the wiper arms could damage the wiper arm and blade, and may scratch or crack the windshield.
1. Raise the wiper arm.
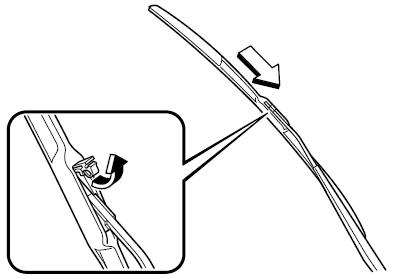
2. Open the clip and slide the blade assembly in the direction of the arrow.
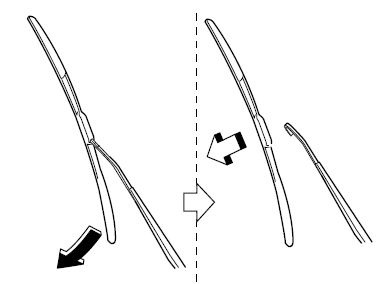
3. Tilt the blade assembly and remove it from the arm.
CAUTION
To prevent damage to the windshield let the wiper arm down easily, do not let it slap down on the windshield.
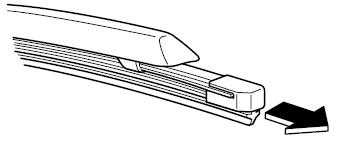
4. Pull down the blade rubber and slide it out of blade holder.
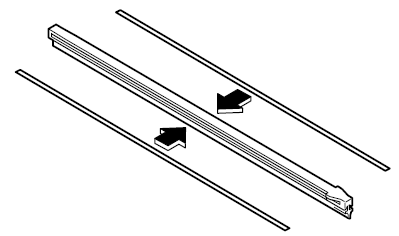
5. Remove the metal stiffeners from each blade rubber and install them in the new blade.
CAUTION
- Do not bend or discard the stiffeners. You need to use them again.
- If the metal stiffeners are switched, the blade's wiping efficiency could
be reduced.
So do not use the driver's side metal stiffeners on the passenger's side, or vice versa.
- Be sure to reinstall the metal stiffeners in the new blade rubber so that the curve is the same as it was in the old blade rubber.
6. Carefully insert the new blade rubber. Then install the blade assembly in the reverse order of removal.
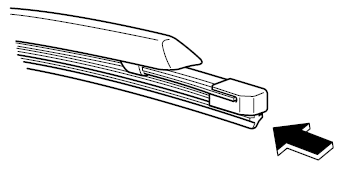
 Wiper Blades
CAUTION
Hot waxes applied by automatic car washers have been known to affect
the wiper's ability to clean windows.
To prevent damage to the wiper blades, do not use gasoline, kerosene,
pai ...
 Battery
WARNING
Wash hands after handling the battery and related accessories: Battery
posts, terminals and related accessories contain lead and lead compounds, chemicals
known to the State of California ...
Other materials:
Mazda 6 Owners Manual: Identification Numbers
Vehicle Information Labels
Vehicle Identification Number
The vehicle identification number legally identifies your vehicle. The number
is on a plate attached to the cowl panel located on the left corner of the dashboard.
This plate can easily be seen through the windshield.
Motor Vehicle Sa ...
Mazda 6 Owners Manual: Water pump
1. Disconnect the negative battery cable.
2. Drain the engine coolant. (See COOLING SYSTEM SERVICE WARNINGS.) (See
ENGINE COOLANT REPLACEMENT.)
3. Loosen the water pump pulley bolt to remove the drive belt. (See DRIVE
BELT REPLACEMENT.)
4. Remove in the order indicated in the table.
5. Insta ...
