Mazda 6 Service Manual: Clutch unit removal/installation
1. Remove in the order indicated in the table.
2. Install in the reverse order oremoval.
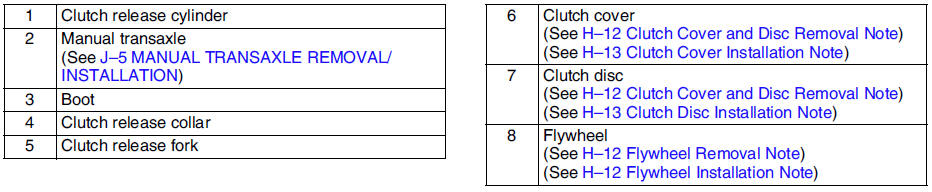
Clutch Cover and Disc Removal Note
1. Install the SSTs.

2. Loosen each bolt one turn at a time in a crisscross pattern until spring tension is released.
3. Remove the clutch cover and disc.
Flywheel Removal Note
1. Hold the flywheel using the SST.
2. Remove the bolts evenly and gradually in a crisscross pattern.
3. Remove the flywheel.
Flywheel Installation Note
1. Install the flywheel to the crankshaft.
2. When reusing the bolts, clean threads and hole, then apply locking compound to the threads.
Note
- No locking compound is needed when using new bolts.
3. Hand-tighten the flywheel lock bolts.
4. Install the SST
to the flywheel.

5. Gradually tighten the flywheel lock bolts in a crisscross pattern.
Tightning torque
108-115 N·m {11.1-11.7 kgf·m, 79.7-84.8 ft·lbf}
Clutch Disc Installation Note
Hold the clutch disc position using the SST
.
Clutch Cover Installation Note
1. Install the SSTs.
2. Tighten the bolts evenly and gradually in a crisscross pattern.
Tightening torque 18.6-25.5 N·m {1.9-2.6 kgf·m, 14-19 ft·lbf}
 Clutch unit
...
 Clutch cover inspection
1. Measure the wear of the diaphragm spring fingers.
If not as specified, replace the clutch cover.
Depth
0.6 mm {0.024 in} max.
2. Measure the flatness of the pressure plate with a s ...
Other materials:
Mazda 6 Service Manual: Rear wheel alignment
Specification (Unloaded)*1
Normal
Elevated*3
*1 : Engine coolant and engine oil are at specified level. Spare tire, jack
and tools are in designated position.
*2 : Difference between left and right must not exceed 1°30'.
*3 : Distance between wheel center and fender brim is 392 mm {15.4 ...
Mazda 6 Service Manual: Shroud panel removal/installation
1. Remove the bonnet. (See BONNET REMOVAL/INSTALLATION.)
2. Remove the front bumper. (See FRONT BUMPER REMOVAL/INSTALLATION.)
3. Remove the front combination light. (See FRONT COMBINATION LIGHT
REMOVAL/INSTALLATION.)
4. Remove the front bumper reinforcement. (See BUMPER REINFORCEMENT
REMOVAL/ ...