Mazda 6 Service Manual: High-mount brake light removal/installation
4SD
In-vehicle-type
1. Disconnect the negative battery cable.
2. Remove in the order indicated in the table.
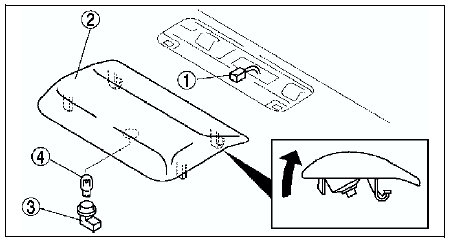
3. Install in the reverse order of removal.
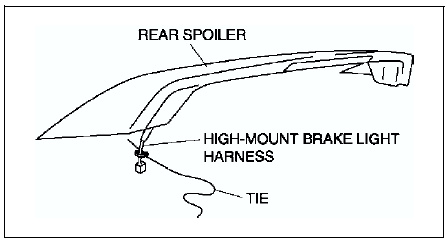
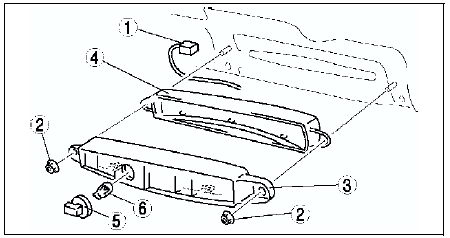
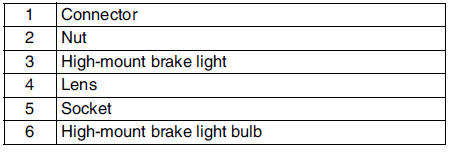
Rear spoiler type
1. Disconnect the negative battery cable.
2. Remove the rear spoiler. (See REAR SPOILER REMOVAL/INSTALLATION)
3. Remove in the order indicated in the table.
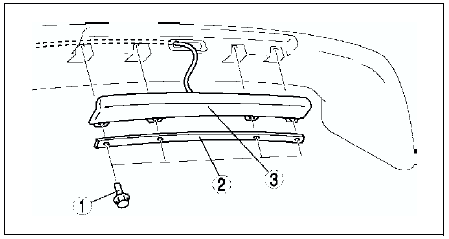
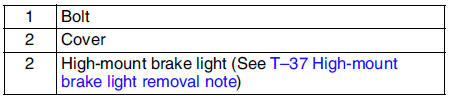
4. Install in the reverse order of removal.
High-mount brake light removal note
Tie a string to the end of the connector of the high-mount brake light beforehand so that the connector can be passed easily through the rear spoiler during installation.
5HB
1. Disconnect the negative battery cable.
2. Remove the liftgate lower trim. (See LIFTGATE LOWER TRIM REMOVAL/INSTALLATION)
3. Remove in the order indicated in the table.
4. Install in the reverse order of removal.
 Inboard combination light removal/installation
1. Disconnect the negative battery cable.
2. Remove the trunk lid trim (liftgate lower trim). (See TRUNK LID TRIM
REMOVAL/INSTALLATION) (See LIFTGATE LOWER TRIM REMOVAL/INSTALLATION)
3. Remove in ...
 License plate light removal/installation
1. Disconnect the negative battery cable.
2. Remove the rear finisher. (See REAR FINISHER REMOVAL/INSTALLATION)
3. Remove in the order indicated in the table.
4. Install in the reverse order of ...
Other materials:
Mazda 6 Service Manual: Noise filter removal/installation
Brake Light Noise Filter
1. Disconnect the negative battery cable.
2. Remove in the order indicated in the table.
3. Install in the reverse order of removal.
Rear Window Defroster Noise Filter
1. Disconnect the negative battery cable.
2. Remove the rear package trim.
3. Remove in the orde ...
Mazda 6 Service Manual: Rear door unit removal/installation
1. Remove the rear door glass.
2. Remove the inner handle.
3. Remove the rear door speaker.
4. Disconnect the power window motor connector, and power door lock actuator
connector.
5. Remove the rear door harness from the rear door unit.
6. Remove the bolts.
7. Remove the rear door lock act ...