Mazda 6 Service Manual: Rear coil spring removal/installation
1. Remove the rear auto leveling sensor. (See REAR AUTO LEVELING SENSOR REMOVAL/INSTALLATION.)
2. Remove in the order indicated in the table.
3. Install in the reverse order of removal.
4. Adjust the headlight zeroset. (See HEADLIGHT ZEROSET.)
5. Inspect the rear wheel alignment. (See REAR WHEEL ALIGNMENT.)
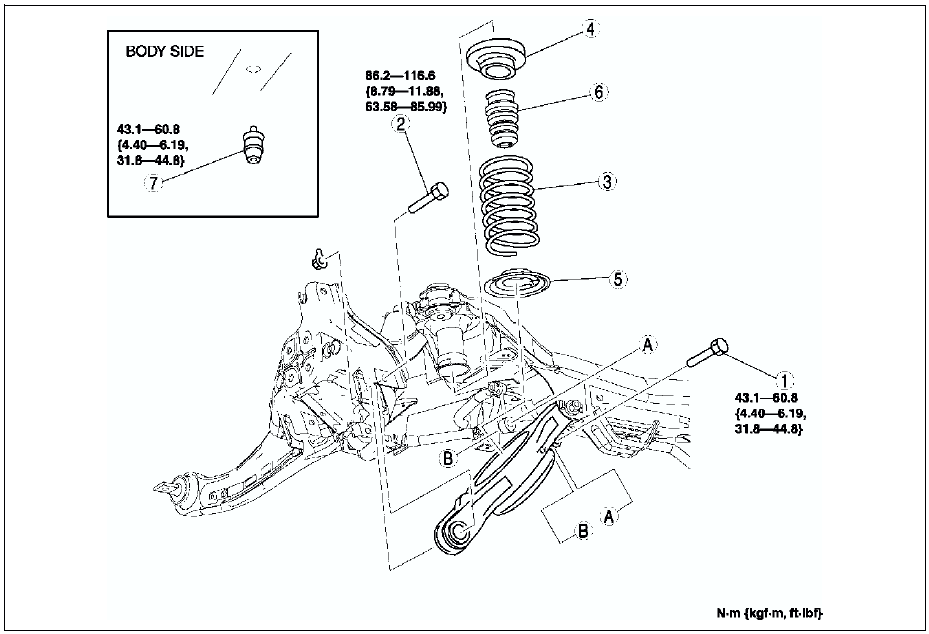

Bolt (Rear Lower Arm Outer Side) Removal Note
1. Support the lower arm with a jack.
2. Loosen the inner bolt of the lower arm.
3. Remove the outer bolt of the lower arm.
Bound Stopper (Body Side) Removal/Installation Note
Remove or/and install the bound stopper (body side) using the extension bar.
Rear Coil Spring Installation Note
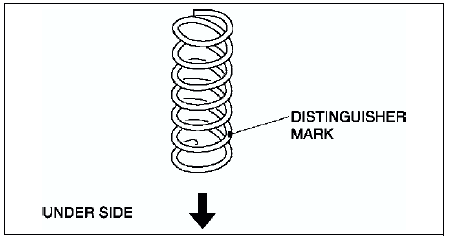
1. Install the coil spring so that the distinguisher mark is located on under side.
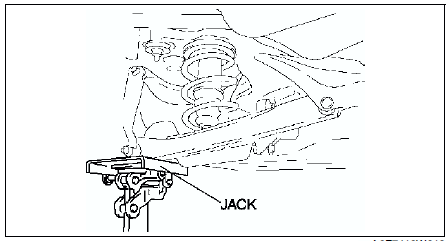
2. Position the jack under the lower arm and jack up slowly.
Warning
- Installing the coil spring is dangerous. The coil spring could fly off, and cause serious injure of death.
3. Install the lower arm (outer side) bolt.
 Rear shock absorber removal/installation
Caution
Performing the following procedures without first removing the ABS
wheel-speed sensor may possibly cause an open circuit in the harness if it
is pulled by mistake. Before performing ...
 Rear lower arm removal/installation
1. Remove in the order indicated in the table.
2. Install in the reverse order of removal.
3. Inspect the rear wheel alignment. (See REAR WHEEL ALIGNMENT.)
...
Other materials:
Mazda 6 Service Manual: Canceling Operation of Blind Spot Monitoring (BSM)
The Blind Spot Monitoring (BSM) system can be set to inoperable.
When the Blind Spot Monitoring (BSM) is set to inoperable, the Blind Spot Monitoring
(BSM) and Rear Cross Traffic Alert (RCTA) systems are turned off and the Blind Spot
Monitoring (BSM) OFF indicator light in the instrument cluste ...
Mazda 6 Service Manual: Front oil seal
FRONT OIL SEAL REPLACEMENT
1. Disconnect the negative battery cable.
2. Remove the spark plugs. (See SPARK PLUG REMOVAL/INSTALLATION.)
3. Remove the Cylinder head cover. (See Cylinder Head Cover Installation
Note.)
4. Remove the drive belt. (See DRIVE BELT REPLACEMENT.)
5. Remove the front dr ...