Mazda 6 Service Manual: Rear door garnish installation
Note
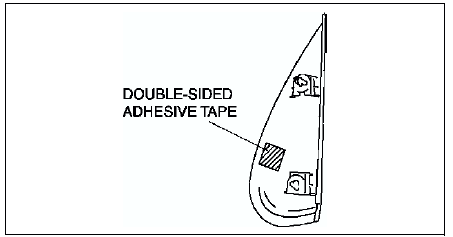
- Double-sided adhesive tape has already been attached to the new rear door garnish.
Warning
- Using a razor with bare hands can cause injury. Always wear gloves when using a razor.
1. When installing a new rear door garnish, follow the procedure below:
(1) Remove the adhesive remaining on the body using razor.
(2) Remove any grease or dirt from the adhesion surface of the body.
2. When reusing the rear door garnish, follow the procedure below:
(1) Remove the adhesive remaining on the rear door garnish and the body using a razor.
(2) Remove any grease or dirt from the adhesion surface of the rear door garnish and the body.
(3) Apply primer to the bonding area of the rear door garnish.
(4) Attach double-sided adhesive tape to the rear door garnish as shown.

3. Peel off the backing of the double-sided adhesive tape, then install the rear door garnish to the body.
 Rear door garnish removal
1. Disengage the door garnish clips using a fastener remover.
2. While cutting the double-sided adhesive tape using a screwdriver or a
razor, separate the rear door garnish from the body.
Warning
...
 Side protector removal
1. Pry the side protector end 20-30 mm {0.8-1.1 in} using a flathead
screwdriver or a razor.
Warning
Using a razor with bare hands can cause injury. Always wear gloves
when using a razor.
...
Other materials:
Mazda 6 Service Manual: Connectors
Data link connector
Insert the probe into the terminal when connecting a jumper wire to the
data link connector.
Caution
Inserting a jumper wire probe into the data link connector
terminal may damage the terminal.
Disconnecting connectors
When disconnecting connector, grasp ...
Mazda 6 Service Manual: Master cylinder disassembly/assembly
Caution
If the master cylinder body is damaged, replace the unit as a
component. When securing the master cylinder in a vise, tighten only the
flange of the master cylinder.
1. Disassemble in the order indicated in the table.
2. Assemble in the reverse order of disassembly.
Stop ...
