
Mazda 6 Service Manual: Steering gear and linkage disassembly
Caution
- Place copper plates, rag, or similar material in a vise, when securing the mounting bracket portion of the steering gear.
Disassemble in the order indicated in the table.
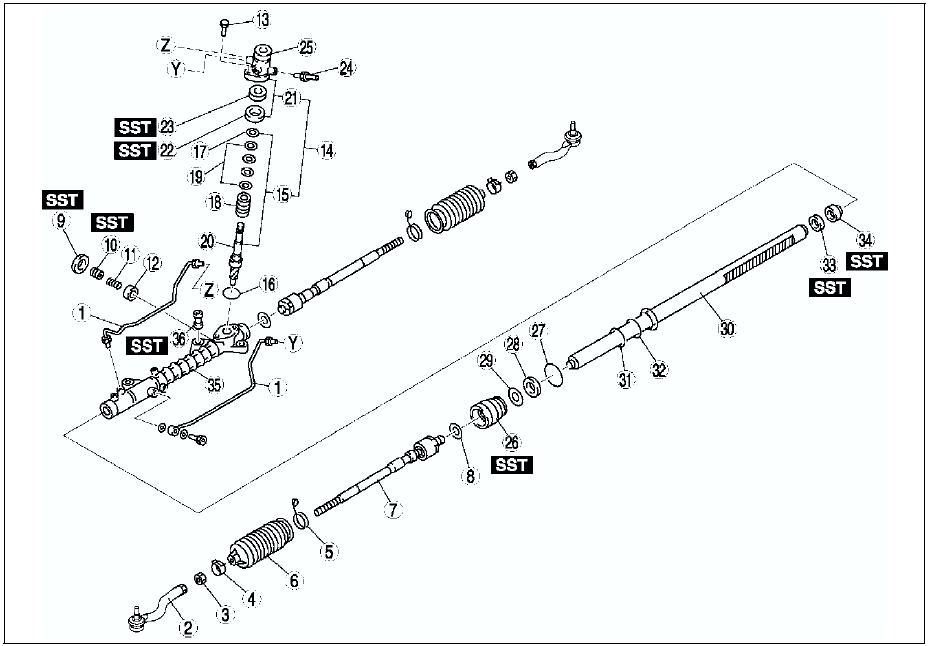
.
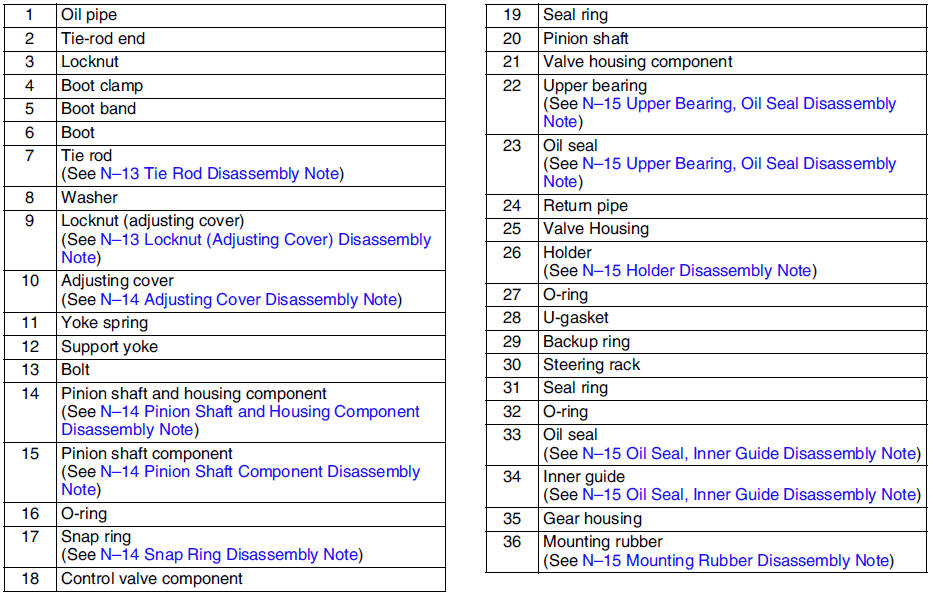
Tie Rod Disassembly Note
1. Unclamp the washer.
2. Remove the tie rod.
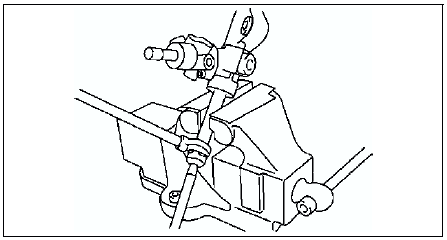
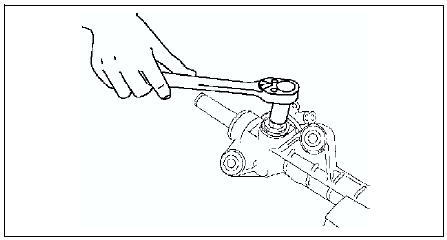
Locknut (Adjusting Cover) Disassembly Note
Remove the locknut using the SST
.
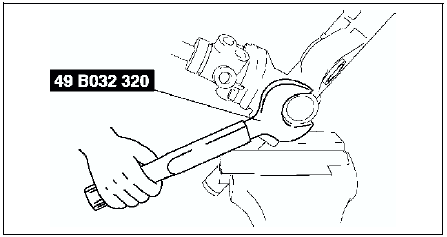
Adjusting Cover Disassembly Note
Remove the adjusting cover.
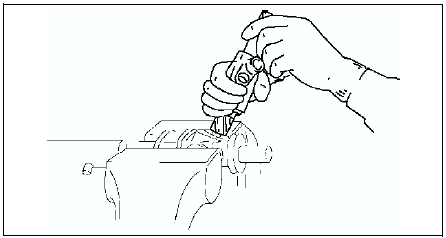
Pinion Shaft and Housing Component Disassembly Note
Hold the pinion shaft as shown, and pull out the pinion shaft and housing component.
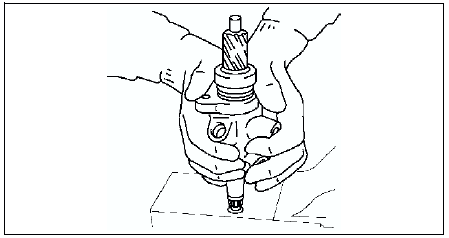
Pinion Shaft Component Disassembly Note
Note
- If the pinion shaft does not come out easily, remove it using a press.
Push out the pinion shaft componet from the valve housing as shown.
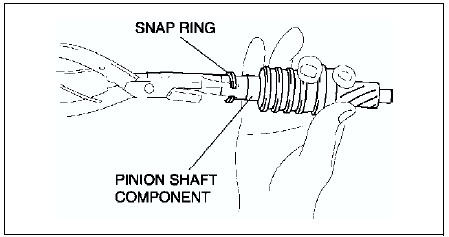
Snap Ring Disassembly Note
Carefully remove the snap ring without damaging the pinion shaft component.
Upper Bearing, Oil Seal Disassembly Note
1. Set the SST
as shown.
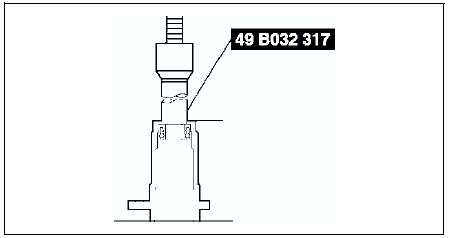
2. Using a press, remove the oil seal and upper bearing without applying pressure to the edge of the valve housing.
Holder Disassembly Note
1. Cut away the staked area by using a drill.
Caution
- Carefully pull out the holder without damaging the U gasket.
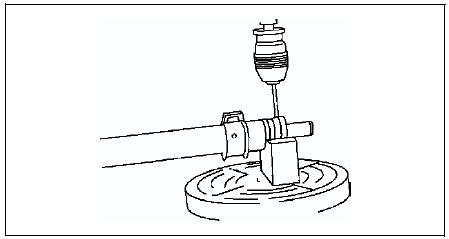
2. Disassemble the holder.
Oil Seal, Inner Guide Disassembly Note
1. Set the SSTs
into the valve side.
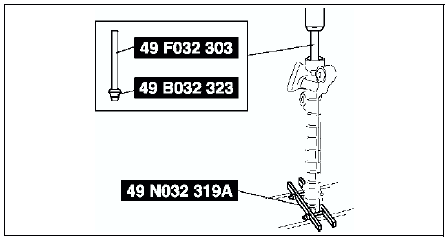
2. Install the SST
to the gear housing.
3. Press out the oil seal and inner guide.
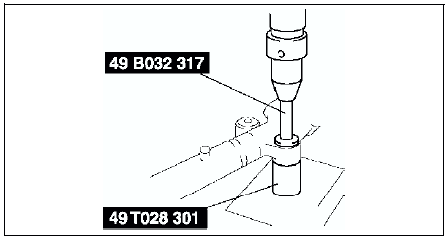
Mounting Rubber Disassembly Note
- Press the mounting rubber out from the gear housing using the SSTs
and a press.
 Steering gear and linkage removal/installation
Caution
Performing the following procedures without first removing the ABS
wheel-speed sensor may possibly cause an open circuit in the harness if it
is pulled by mistake. Before performing ...
 Steering gear and linkage inspection
Rack Inspection
1. Inspect the rack for cracking, damage, and tooth wear. Replace it as
necessary.
2. Measure the runout of the rack.
Runout
Near point A: 0.15 mm {0.006 in} max.
Near po ...
Other materials:
Mazda 6 Service Manual: Inspecting Engine Oil Level
1. Be sure the vehicle is on a level surface.
2. Warm up the engine to normal operating temperature.
3. Turn it off and wait at least 5 minutes for the oil to return to the oil pan.
4. Pull out the dipstick, wipe it clean, and reinsert it fully.
5. Pull it out again and examine the level.
The ...
Mazda 6 Service Manual: Engine Coolant Temperature Gauge
Displays the engine coolant temperature. The blue gauge indicates that the engine
coolant temperature is low, and the red gauge indicates that the engine coolant
temperature is high and overheating.
CAUTION
If the high engine coolant temperature warning light (red) turns on, there
is a pos ...