Mazda 6 Service Manual: Actuator cable installation
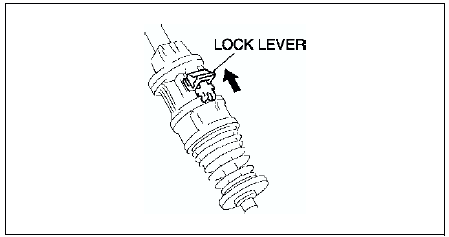
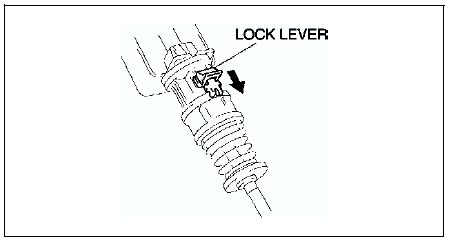
1. Slide the lock lever in the direction shown by the arrow to unlock the adjuster.
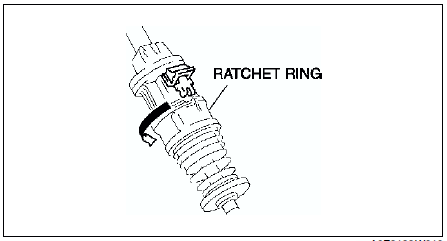
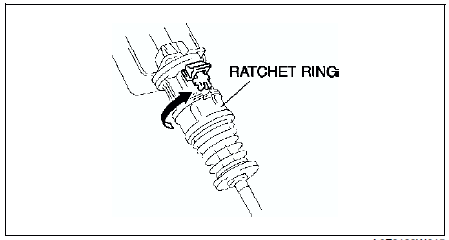
2. Turn the ratchet ring to release lock in the direction shown by the arrow.
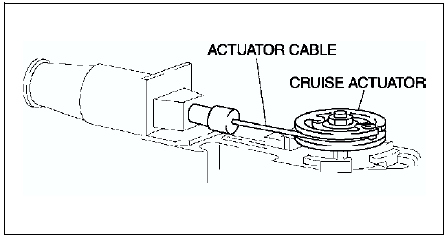
3. Install the actuator cable to the cruise actuator.
Caution
- Due to the possibility of actuator cable damage, make sure there is no twisting in the cable when installing.
4. Install the cruise actuator. (See CRUISE ACTUATOR REMOVAL/INSTALLATION.)
5. Pass the actuator cable under the accelerator cable.
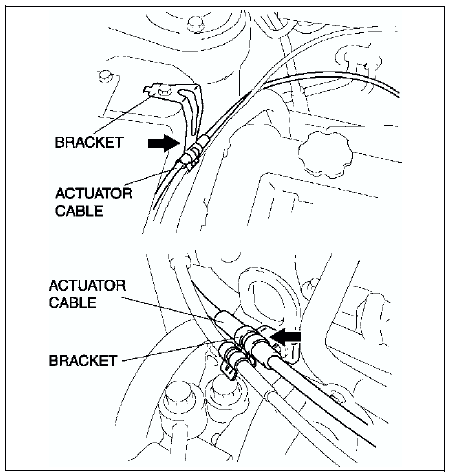
6. Install the actuator cable to the bracket.
7. Install the grommet to the cable bracket.
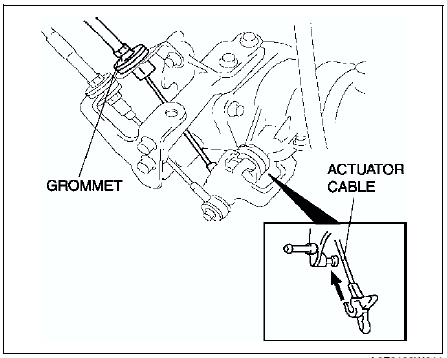
8. Move the throttle, and install the end fitting of the actuator cable to the throttle.
Caution
- Due to the possibility of actuator cable damage, make sure there is no twisting in the cable when installing.
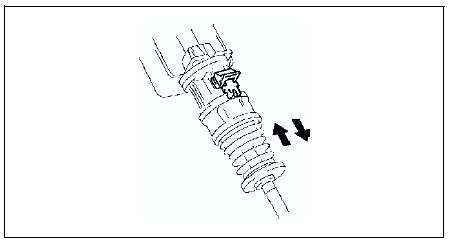
9. To adjust the free play, push or pull the actuator cable directly behind the spring two times.
10. Turn the ratchet ring in the direction shown by the arrow to lock it.
11. Slide the lock lever in the direction shown by the arrow to lock the adjuster.
12. Install the cover to the cruise actuator.
13. Install the plug hole plate.
CRUISE CONTROL SWITCH REMOVAL/INSTALLATION
Note
- The audio control switch and the cruise control switch use a common connector. (See AUDIO CONTROL SWITCH REMOVAL/INSTALLATION.)
 Actuator cable removal
1. Remove the plug hole plate.
2. Remove the cover from the cruise actuator. (See CRUISE ACTUATOR
REMOVAL/INSTALLATION.)
3. Remove the installation nut and pull the cruise actuator toward you.
4. ...
 Cruise control switch inspection
1. Disconnect the negative battery cable.
2. Remove the driver-side air bag module. (See DRIVER-SIDE AIR BAG MODULE
REMOVAL/INSTALLATION.)
3. Disconnect the cruise control switch connector.
4. In ...
Other materials:
Mazda 6 Service Manual: On-board diagnostic test
DTCs Reading Procedure
1. Perform the necessary vehicle preparation and visual inspection.
2. Connect WDS or equivalent to the vehicle DLC-2 16-pin connector located as
shown in the figure.
3. Retrieve DTCs by WDS or equivalent.
Pending Trouble Code Access Procedure
1. Perform the necessary ...
Mazda 6 Service Manual: Fuel line pressure inspection
Warning
Fuel line spills and leakage are dangerous. Fuel can ignite and
cause serious injuries or death. Fuel can also irritate skin and eyes. To
prevent this, always complete the BEFORE REPAIR PROCEDURE. (See BEFORE
REPAIR PROCEDURE.)
Caution
Disconnecting/connecting the quick r ...
