Mazda 6 Service Manual: Front upper arm removal/installation
Caution
- Performing the following procedures without first removing the ABS wheel-speed sensor may possibly cause an open circuit in the harness if it is pulled by mistake. Before performing the following procedures, remove the ABS wheel-sensor (axle side) and fix it to an appropriate place where the sensor will not be pulled by mistake while servicing the vehicle.
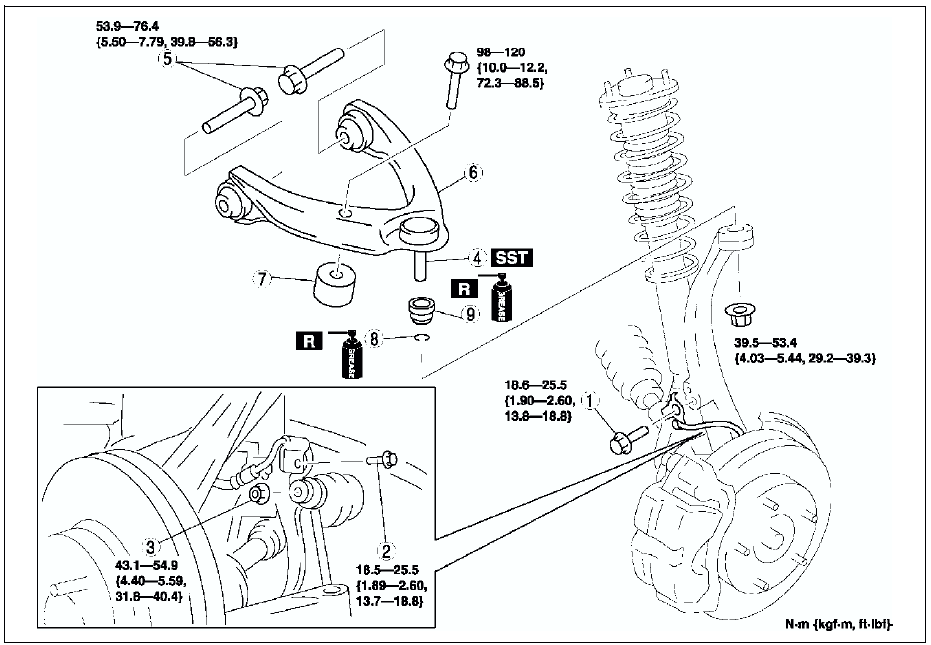
1. Remove in the order indicated in the table.
2. Install in the reverse order of removal.
3. Inspect the front wheel alignment. (See FRONT WHEEL ALIGNMENT.)


Front Upper Arm Ball Joint Removal Note
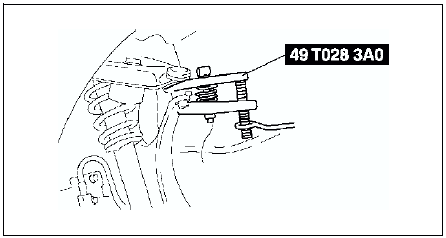
1. Support the knuckle using the jack.
2. Separate the ball joint from the knuckle using the SST.

Bolt (Front Upper Arm) Removal Note
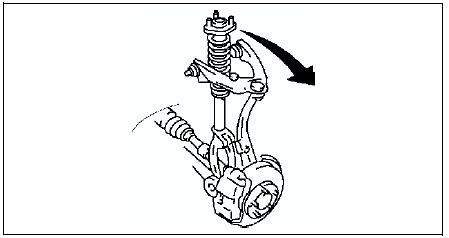
1. Remove the nuts (3 locations) from the upper part of the front shock absorber.
2. Pull the front shock absorber and coil spring out of the way, towards the outer side of the vehicle.

3. Remove the bolts.
Clip Installation Note
1. Wipe the grease off the ball stud.
2. Fill the inside of the new dust boot with grease.
3. Install the boot on the ball joint.
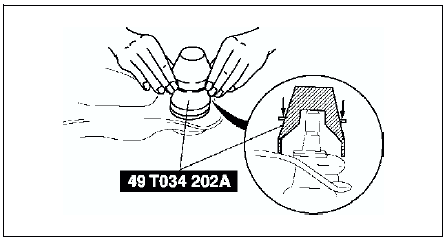
4. Install the new clip using the SST.

5. Verify that the clip is installed securely to the groove.
6. Wipe away the excess grease.
 Front shock absorber disposal
Warning
Whenever drilling into a shock absorber, wear protective eye wear.
The gas in the shock absorber is pressurized, and could spray metal chips
into the eyes and face when drilling.
...
 Front upper arm inspection
1. Remove the upper arm from the vehicle.
2. Inspect for damage, cracks, and bending.
3. Inspect the ball joint rotation torque.
(1) Rotate the ball joint five times.
(2) Measure the rotatio ...
Other materials:
Mazda 6 Service Manual: Maintenance Monitor
The following maintenance period notifications can be displayed by turning the
Maintenance Monitor on.
Scheduled Maintenance
Tire Rotation
Oil Change
For the setting method and indications for the maintenance monitor, refer to
the Maintenance Monitor.
The maintenance monitor displays ...
Mazda 6 Service Manual: Power steering fluid inspection
Fluid Level Inspection
1. Inspect the power steering fluid level.
Add fluid to the specified level as necessary.
Fluid specification
ATF M-III or equivalent (e.g. Dexron®II)
Fluid Leakage Inspection
1. Start the engine and let it idle.
2. Turn the steering wheel fully to the left and ...
