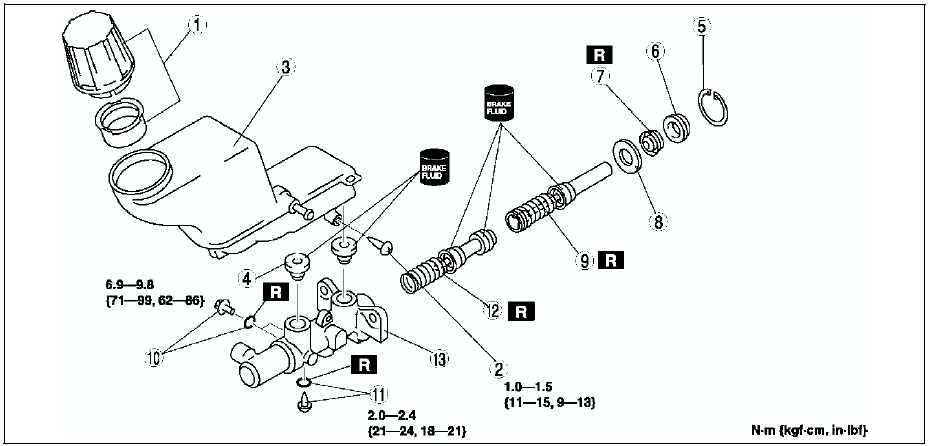
Mazda 6 Service Manual: Master cylinder disassembly/assembly
Caution
- If the master cylinder body is damaged, replace the unit as a component. When securing the master cylinder in a vise, tighten only the flange of the master cylinder.
1. Disassemble in the order indicated in the table.
2. Assemble in the reverse order of disassembly.


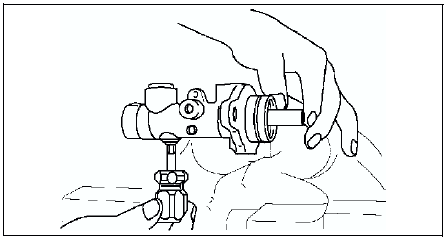
Stop Screw and O-ring (without ABS) Assembly Note
1. Install the secondary piston and primary piston.
2. Install the new O-ring onto the stop screw.
3. Push the primary piston assembly in full.
4. Install and tighten the stop screw.
Tightening torque 2.0-2.4 N·m {21-24 kgf·cm, 18-21 in·lbf}
5. Push and release the secondary piston component to verify that it is held properly by the stop screw.
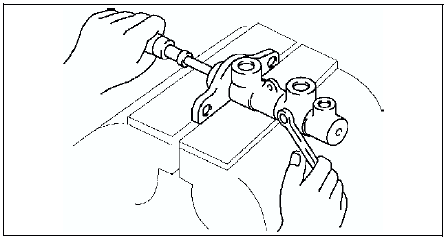
Stop Pin and O-ring (with ABS) Assembly Note
1. Install the secondary piston with the piston hole facing the stop pin and primary piston.
2. Install the new O-ring onto the stop pin.
3. Push the primary piston assembly in full.
4. Install and tighten the stop pin.
Tightening torque 6.9-9.8 N·m {71-99 kgf·cm, 62-86 in·lbf}
5. Push and release the secondary piston component to verify that it is held properly by the stop pin.
 Fluid level sensor inspection
1. Disconnect the negative battery cable.
2. Disconnect the sensor connector.
3. Inspect for continuity between terminals of fluid level sensor.
If not as specified, replace the fluid level sens ...
 Power brake unit removal/installation
1. Remove the master cylinder. (See MASTER CYLINDER REMOVAL/INSTALLATION.)
2. Remove the wiper arm. (See WINDSHIELD WIPER ARM AND BLADE
REMOVAL/INSTALLATION.)
3. Remove the cowl grille. (See COWL ...
Other materials:
Mazda 6 Service Manual: Jack
To remove the jack
1. Lift the trunk mat.
2. Remove the pocket.
3. Turn the wing bolt and jack screw counterclockwise.
To secure the jack
1. Insert the wing bolt into the jack with the jack screw pointing to the front
and turn the wing bolt clockwise to temporarily tighten it.
2. Turn ...
Mazda 6 Service Manual: Fuel Economy Monitor
The Control Status and Fuel Consumption are switched and displayed by operating
each icon in the display.
In addition, after completing a trip, the total energy efficiency to date is
displayed in the ending display when the ending display is turned on.
1. Select the icon on the home
screen ...