Mazda 6 Service Manual: Windshield installation
Caution
- To prevent the sealant from cracking or the glass from being pushed out by air pressure if a door is closed, open all of the windows and leave them open until the sealant has hardened.
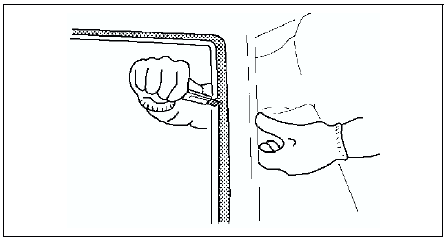
1. Cut away the old sealant using a razor so that 1-2 mm {0.04-0.07 in}
thickness of sealant remains around the circumference of the frame.
Warning
- Using a razor with bare hands can cause injury. Always wear gloves when using a razor.
2. If the sealant has come off completely in any one place, apply some primer after degreasing, and allow it approximately 30 minutes
to dry. Then put on new sealant to create a 2 mm {0.08 in}
layer.
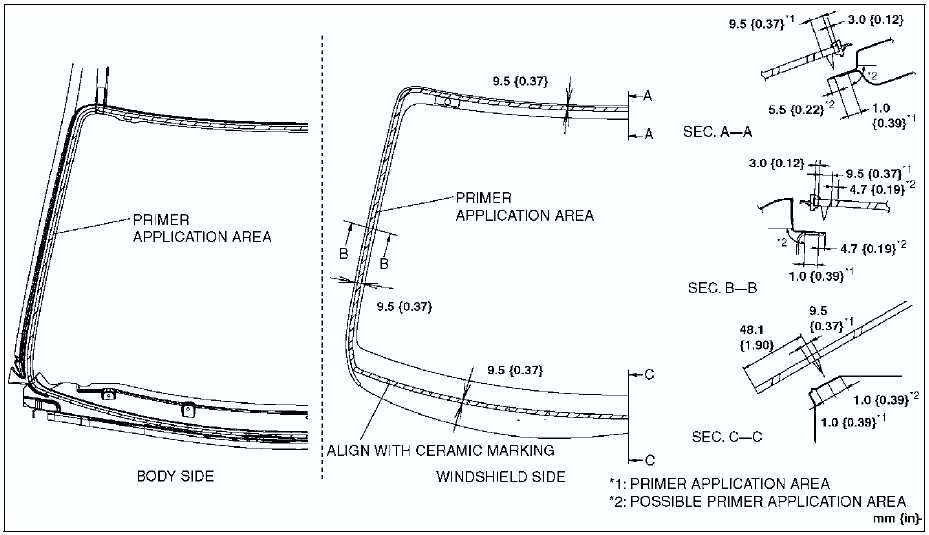
3. Clean and degrease an approximately 50.0 mm {1.97 in}
wide strip around the circumference of the glass and the bonding area on the body.
4. If installing reused glass, install pins at the ceramic void on the upper part of the windshield.
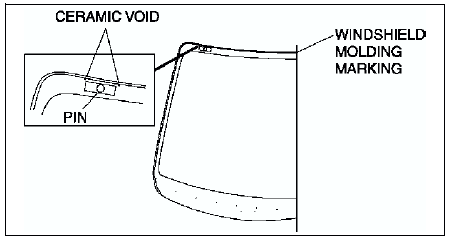
5. If installing reused glass, align the front windshield molding marking and the center of the upper section of the windshield, then install the molding to the winshield.
6. Use only glass primer on the glass, and body primer on the body and the molding. Allow it to dry for approximately 30 minutes.
Caution
- Keep the area free of dirt and grease, and do not touch the surface or the primer may not properly bond to the surface of the glass and body, which may cause leaks to occur.
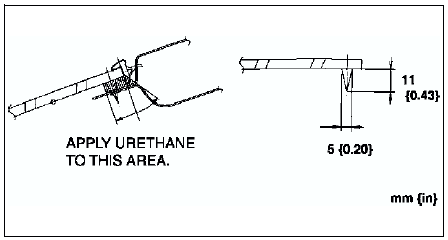
7. Apply urethane to the area of the glass surface as shown in the figure.
8. Set the the windshield in place and insert the pins into the body. Install the windshield.
9. Verify that the gap of the A pillar part as shown the figure.
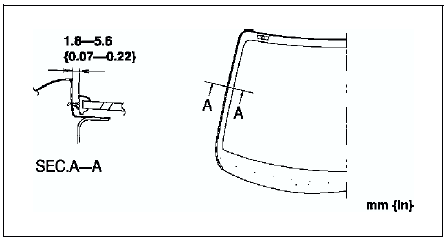
10. Keeping the measurement of the molding lip gap within specification, press completely along the perimeter of the glass.
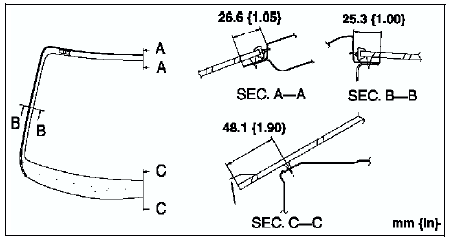
11. Install the seaming welt.
12. Install the cowl grille.
13. Install the headliner
14. Install the interior light. (See FRONT MAP LIGHT REMOVAL/INSTALLATION.)
15. Allow the sealant to harden completely.
Sealant hardening time: 24 hours
 Windshield removal
1. Remove the rearview mirror.
2. Remove the cowl grille.
3. Remove the headliner.
4. Apply protective tape along the edge of the body to protect it from
damage.
5. Apply protective tape to the ...
 Quarter window glass removal/installation
1. Remove the rear door trim.
2. Remove the screw and bolt, then remove the glass guide.
3. Remove the quarter window and the molding together in one piece.
4. Remove the molding from the glass.
...
Other materials:
Mazda 6 Service Manual: Air bleeding
1. Inspect the fluid level. (See POWER STEERING FLUID INSPECTION.)
2. Jack up the front of the vehicle and support it on safety stands.
3. Turn the steering wheel fully to the left and right several times with the
engine not running.
4. Reinspect the fluid level.
If it has dropped, add flui ...
Mazda 6 Service Manual: Shift-Lock System
The shift-lock system prevents shifting out of P unless the brake pedal is depressed.
To shift from P:
1. Depress and hold the brake pedal.
2. Start the engine.
3. Press and hold the lock-release button.
4. Move the selector lever.
NOTE
When the ignition is switched to ACC or the ignition ...
