Mazda 6 Service Manual: Floor covering
FRONT FLOOR COVERING REMOVAL/INSTALLATION
1. Disconnect the negative battery cable.
2. Remove the front seats. (See FRONT SEAT REMOVAL/INSTALLATION.)
3. Remove the rear seat.
4. Remove the front scuff plates.
5. Remove the rear scuff plates.
6. Remove the console.
7. Remove the front side trims.
8. Remove the B-pillar lower trims.
9. Remove the lower anchor of the front seat belt installation bolts.
10. Remove the tire house trim. (5HB)
11. Remove the fuel-filler lid opener bezel.
12. Remove the fasteners.
13. Remove the cap nuts.
14. Remove the clips.
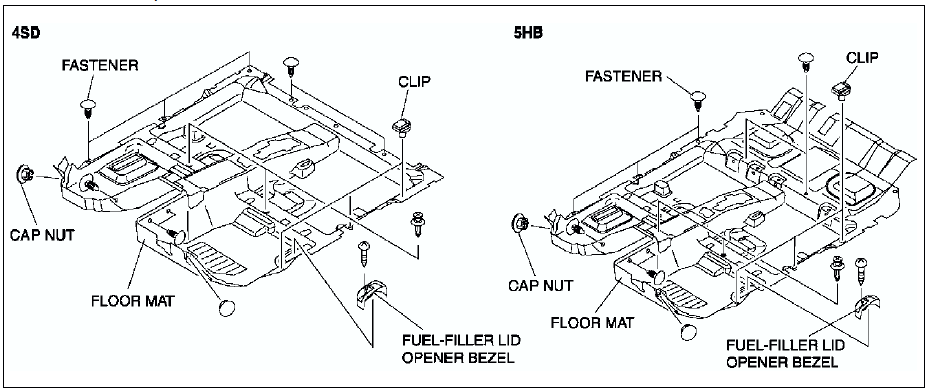
15. Take the front floor covering off from the passenger-side door opening.
16. Install in the reverse order of removal.
 Sunvisor removal/installation
1. Remove the screws, then the sunvisor.
2. Disengage the center adapter (sunvisor stopper) from the body using a
fastener remover.
3. Install in the reverse order of removal. ...
 Seat belt
...
Other materials:
Mazda 6 Service Manual: Generator removal/installation
Warning
When the battery cables are connected, touching the vehicle body with
generator terminal B will generate sparks. This can cause personal injury, fire,
and damage to the electrical components. Always disconnect the battery negative
cables before performing the following operation.
...
Mazda 6 Service Manual: Replacing a Tire
WARNING
Always use tires that are in good condition: Driving with worn tires
is dangerous. Reduced braking, steering, and traction could result in an accident.
Replace all four tires at the same time: Replacing just one tire
is dangerous. It could cause poor handling and poor braking resulting ...