Mazda 6 Service Manual: Rear window glass removal
1. For the 4SD, remove the following parts:
(1) Remove the headliner.
(2) Remove the rear package trim.
2. For the 5HB, remove the following parts.
(1) Remove the rear wiper arm and blade.
(2) Remove the liftgate lower trim.
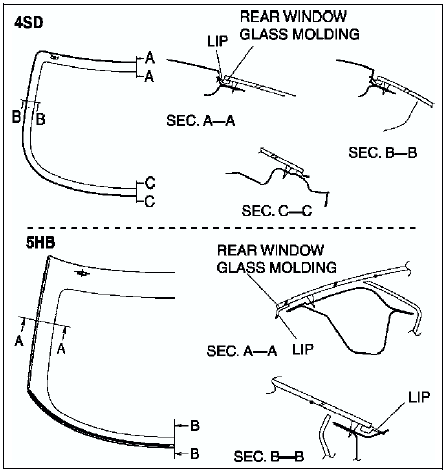
3. Apply protective tape along the edge of the body to protect it from damage.
4. Cut the lip of the rear window molding using a razor.
Warning
- Using a razor with bare hands can cause injury. Always wear gloves when using a razor.
Note
- The rear window molding is a replacement part.
Not Reusing Glass
Note
- For the areas of the sealant that are difficult to cut, use a SST (piano wire) and follow the procedure under Reusing Glass.
1. Use a SST
, and insert the blade into the sealant.
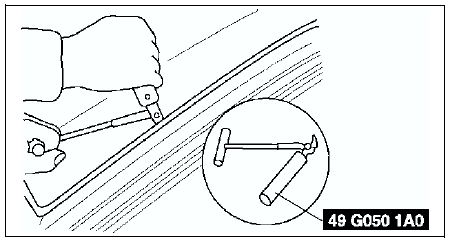
2. Pull through the sealant around the edge of the glass.
3. Remove the glass.
Reusing Glass
Note
- Before removing the rear window glass from the body, mark the position of the glass by affixing tape to the glass and body panel.
1. Make a hole through the sealant, avoiding pins, from the inside of the vehicle using an awl.
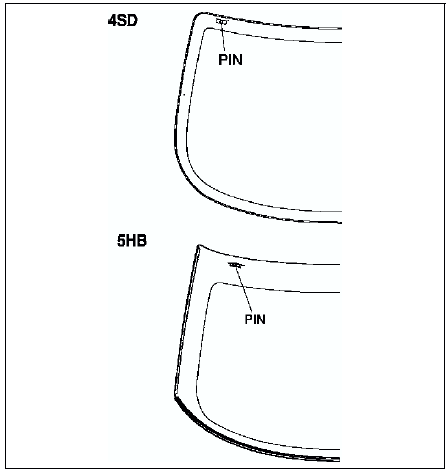
2. Pass the SST
(piano wire) through the hole.
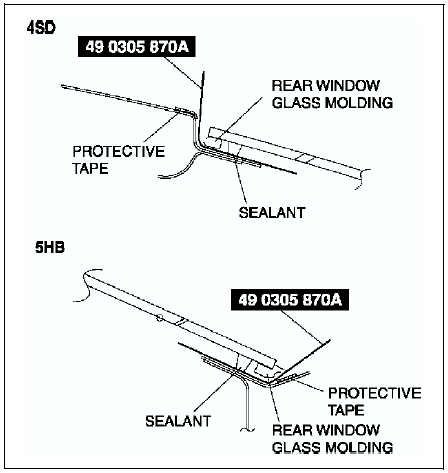
Warning
- Using a SST (piano wire) with bare hands can cause injury. Always wear gloves when using a SST (piano wire).
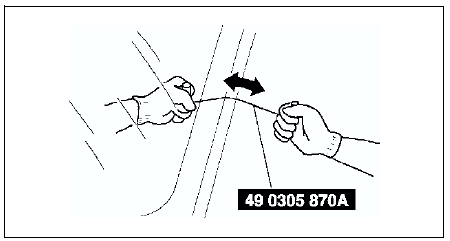
3. Wind each end of the SST
(piano wire) around a bar.
Note
- Use a long sawing action to spread the work over the whole length of the SST (piano wire) to prevent it from breaking.
4. Working with another person, saw through the sealant around the edge of the glass.
5. Remove the rear window glass.
6. Remove the pins from the glass.
7. Remove the rear window molding from the glass.
 Quarter window glass removal/installation
1. Remove the rear door trim.
2. Remove the screw and bolt, then remove the glass guide.
3. Remove the quarter window and the molding together in one piece.
4. Remove the molding from the glass.
...
 Rear window glass installation
Caution
To prevent the sealant from cracking or the glass from being
pushed out by air pressure if a door is closed, open all of the windows and
leave them open until the sealant has hardene ...
Other materials:
Mazda 6 Service Manual: Fuse Panel Description
Fuse block (Engine compartment)
*Some models.
Fuse block (Left side)
*Some models. ...
Mazda 6 Service Manual: Identification Numbers
Vehicle Information Labels
Vehicle Identification Number
The vehicle identification number legally identifies your vehicle. The number
is on a plate attached to the cowl panel located on the left corner of the dashboard.
This plate can easily be seen through the windshield.
Motor Vehicle Sa ...
